Member training
Sign in, keep your business information current, and make the most of your chamber membership. Choose a task for instructions and screenshots.
Screenshots use example businesses. Your chamber's name, prices, and available options may differ.
Sign in for the first time
Find your member account and set your password.
Sign in for the first time
Find your member account and set your password.Use the email your chamber has on file for you. If it is not recognized, choose Request access or contact your chamber. Creating a second account will not connect you to your company.
-
Open your chamber’s member login
Use the member login link on your chamber’s website. Enter your email address and select Continue.
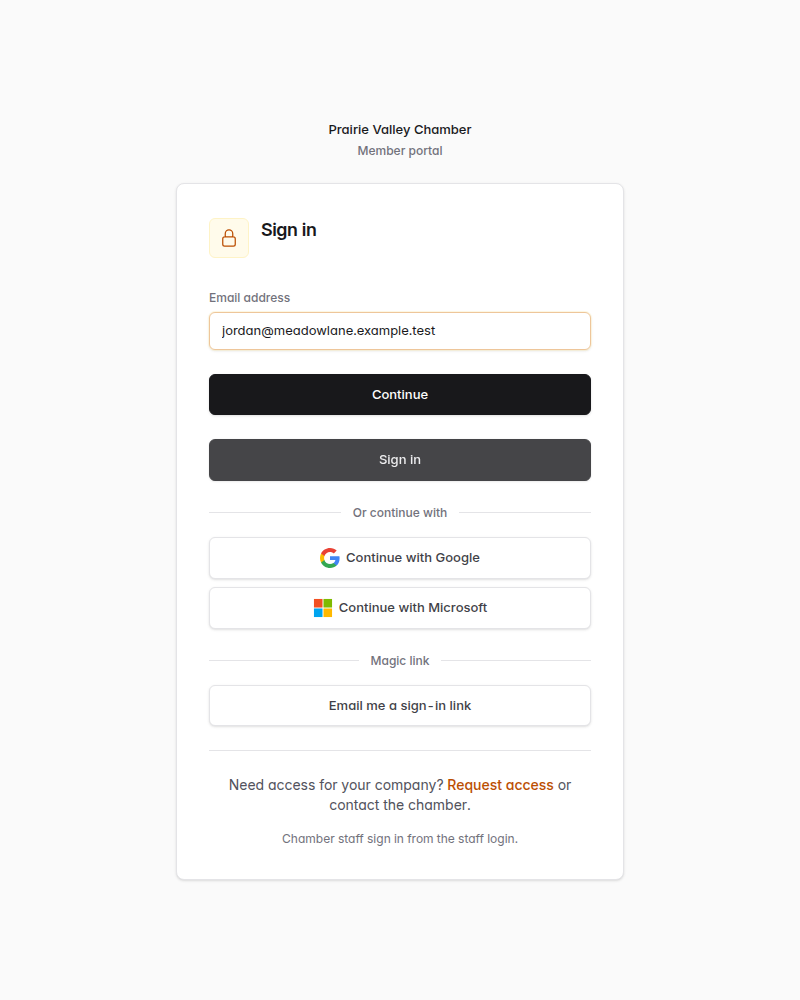
Start with the email address associated with your membership. Choose the image to enlarge -
Request your setup link
If this is your first visit, select Set up your account. If a password box appears instead, your account is already set up: enter your password and select Sign in.
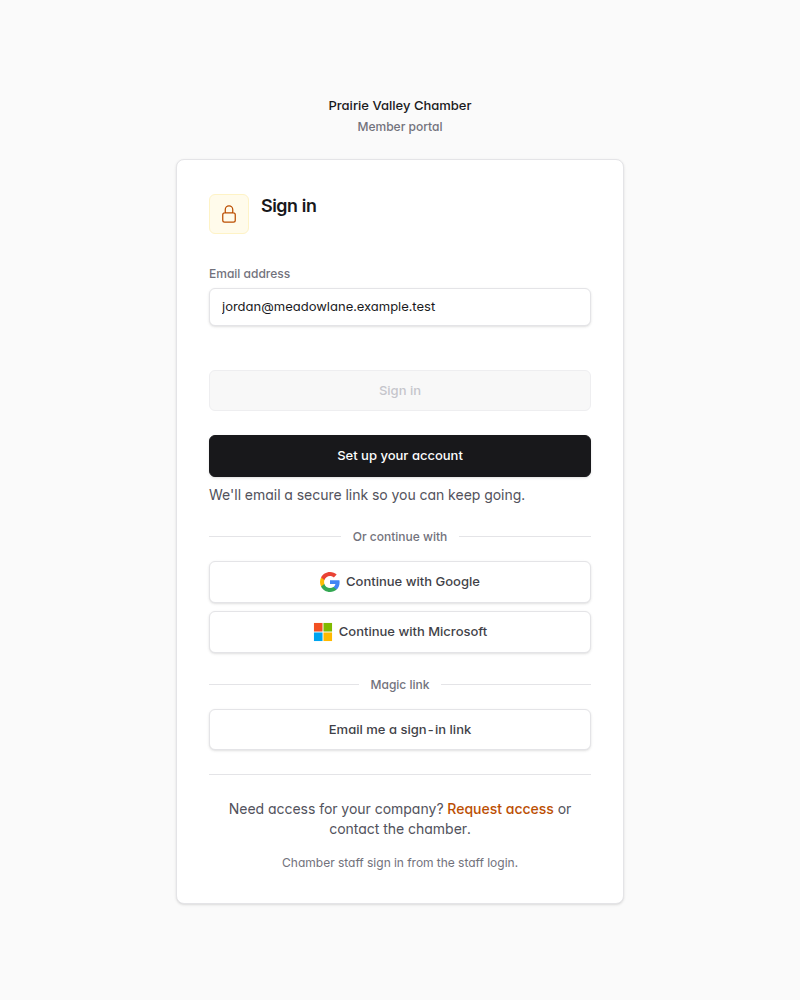
The next step depends on whether your account already has a password. Choose the image to enlarge -
Check your email
Open the message from your chamber and follow its secure link. Check your spam folder if the message does not arrive. Use the newest message if you requested more than one link.
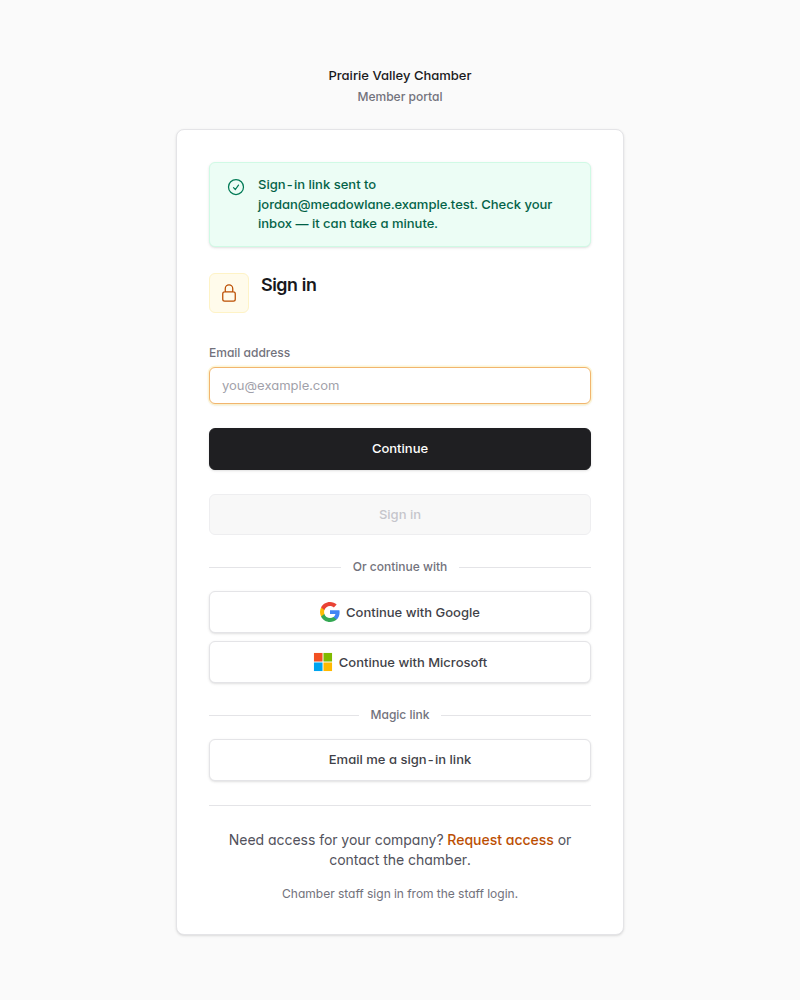
The setup message goes to the email you entered. Choose the image to enlarge -
Confirm the secure sign-in link
The link opens a confirmation page. Select Continue and sign in to continue setting up your account.
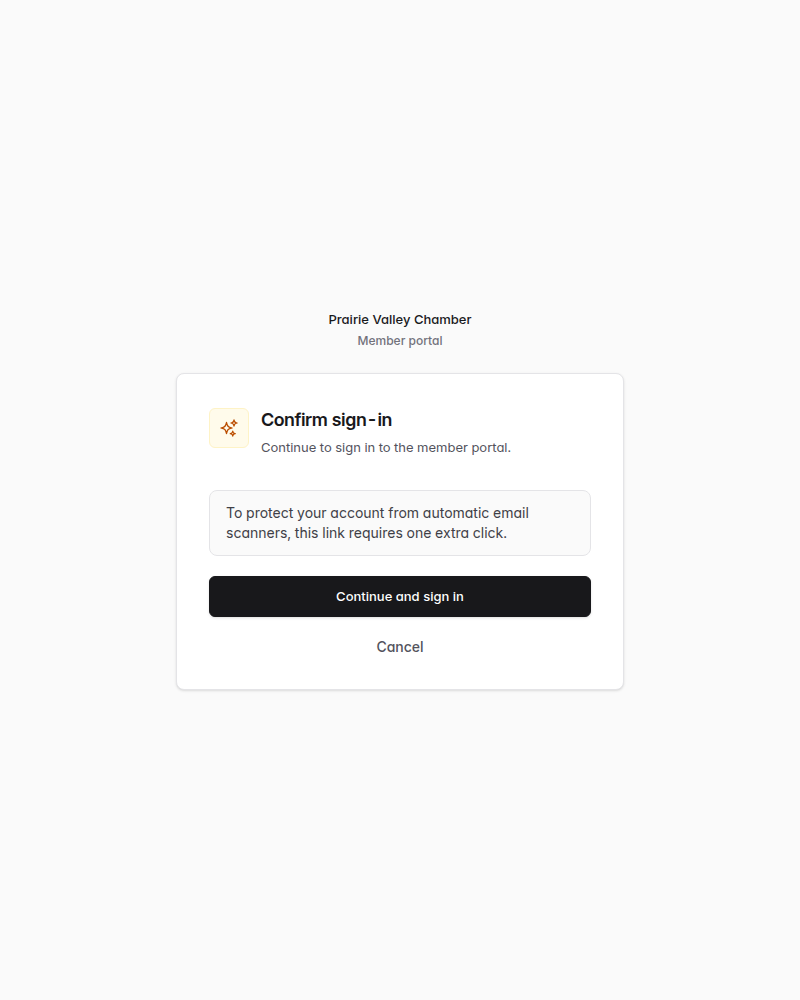
Confirm that you want to use this secure sign-in link. Choose the image to enlarge -
Choose your password
Enter a new password, enter it again in Confirm password, and select Set password. Your member account opens after your password is saved.
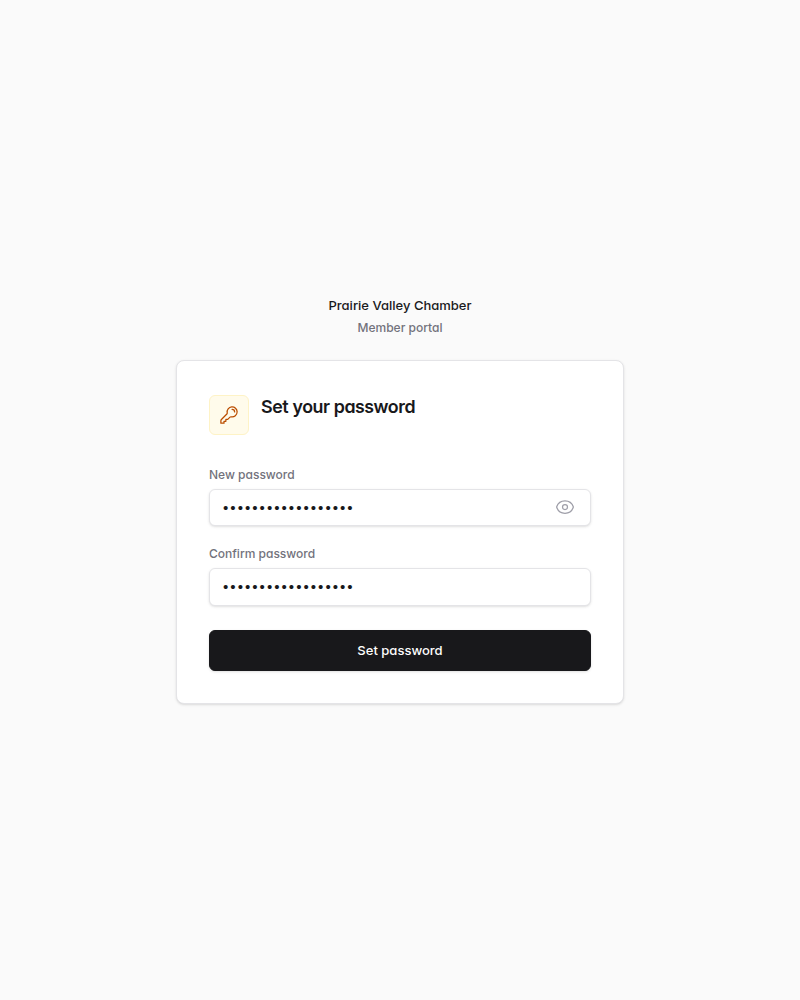
Keep your password private; each person should use their own account. Choose the image to enlarge
Update your personal profile
Keep your own name, email, and phone number current.
Update your personal profile
Keep your own name, email, and phone number current.Changing your email signs you out. Use your new email to sign in again. Keep an email you can access on your profile so you can receive sign-in messages.
-
Open Profile
Open the menu with your initials and select Profile. Under Contact details, update your first name, last name, email, or phone number.
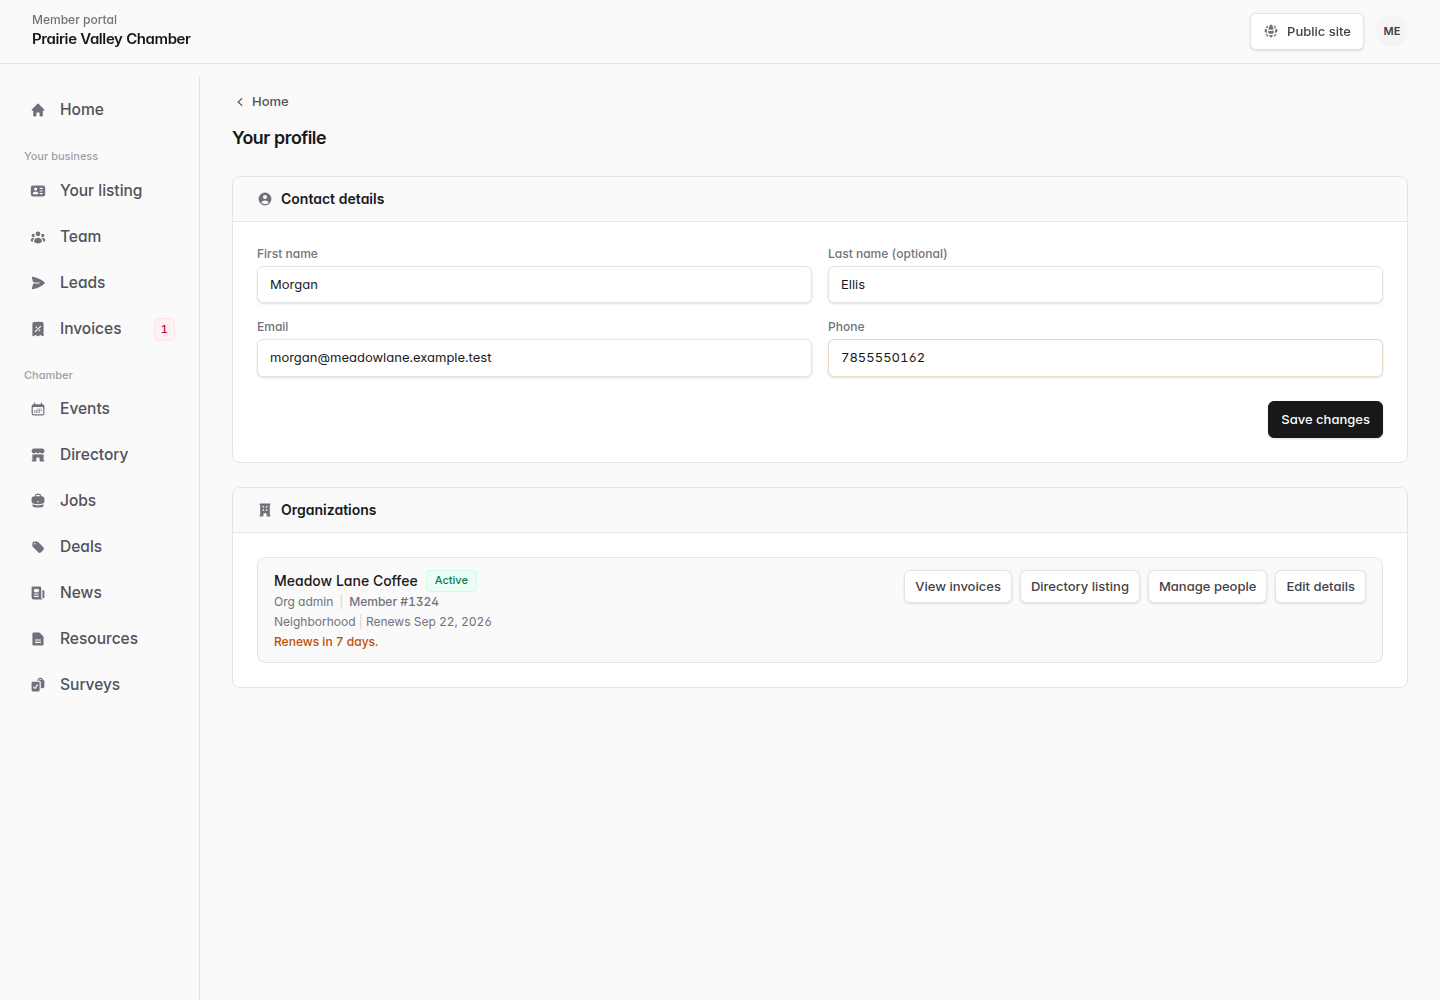
Your profile contains your personal contact details. Choose the image to enlarge -
Save your changes
Select Save changes and check the updated details. Company information is managed separately in the Organizations section below.
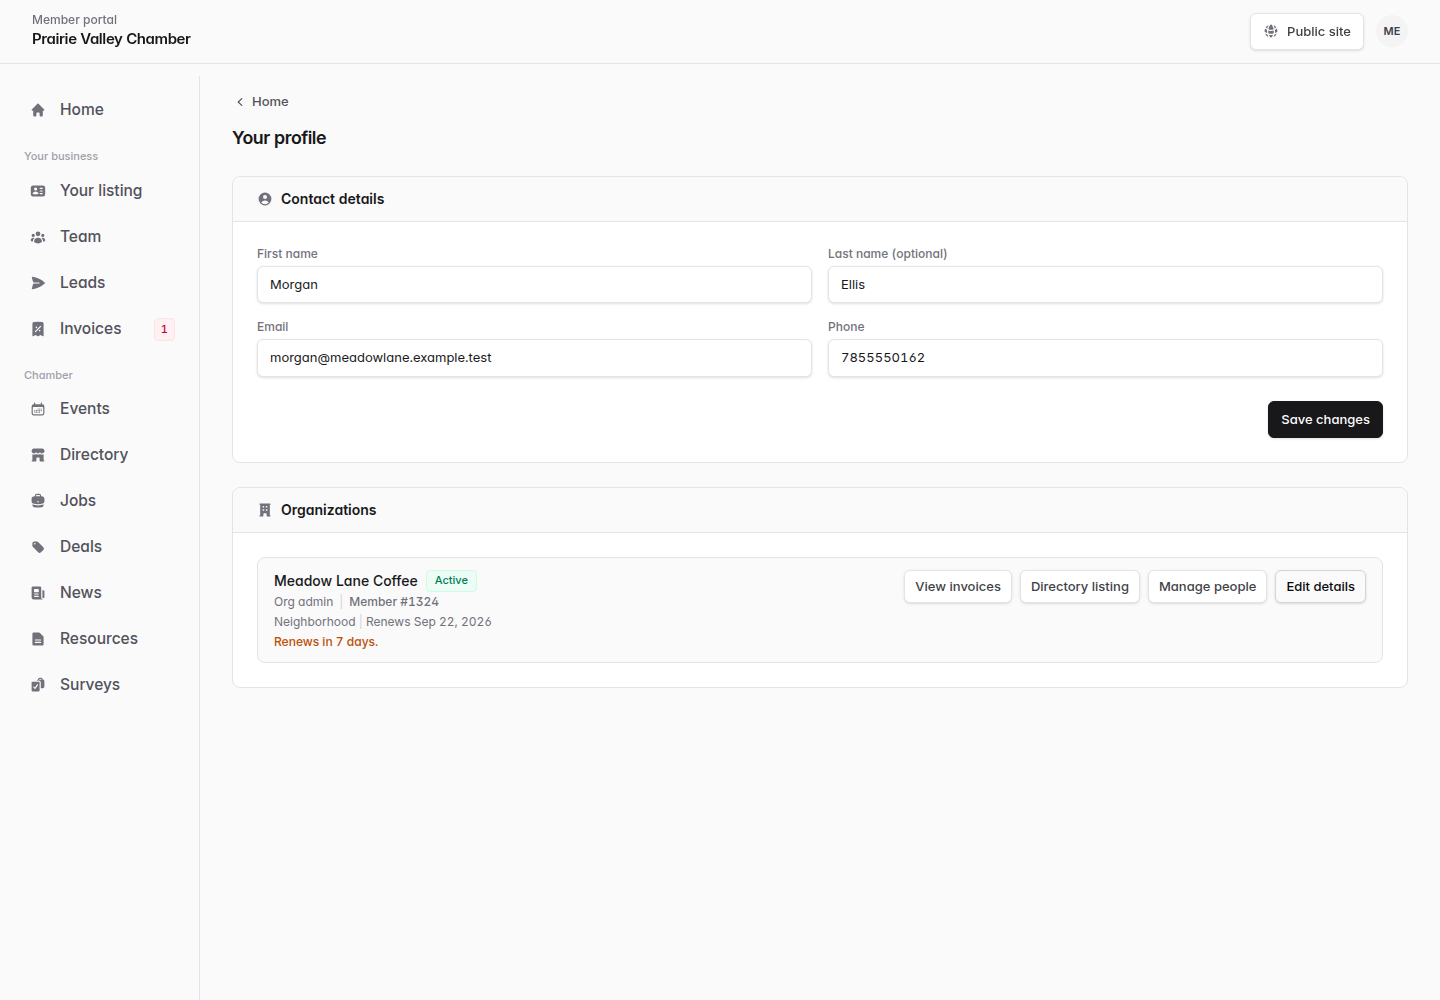
Check the saved values before leaving the page. Choose the image to enlarge
Update your company profile
Update company details and the information people see in the directory.
Update your company profile
Update company details and the information people see in the directory.Company admins
Your profile shows Org admin when you can manage a company. If you need this access, choose Ask for admin access or contact your chamber. Your company’s public directory information has its own editor.
-
Find your company in Profile
Open the menu with your initials, select Profile, and find your company under Organizations. If you are connected to more than one company, check the name before making changes.
The Organizations section shows your access and available actions. Choose the image to enlarge -
Edit company details
Select Edit details. Update the company name, email, phone number, or other editable details.
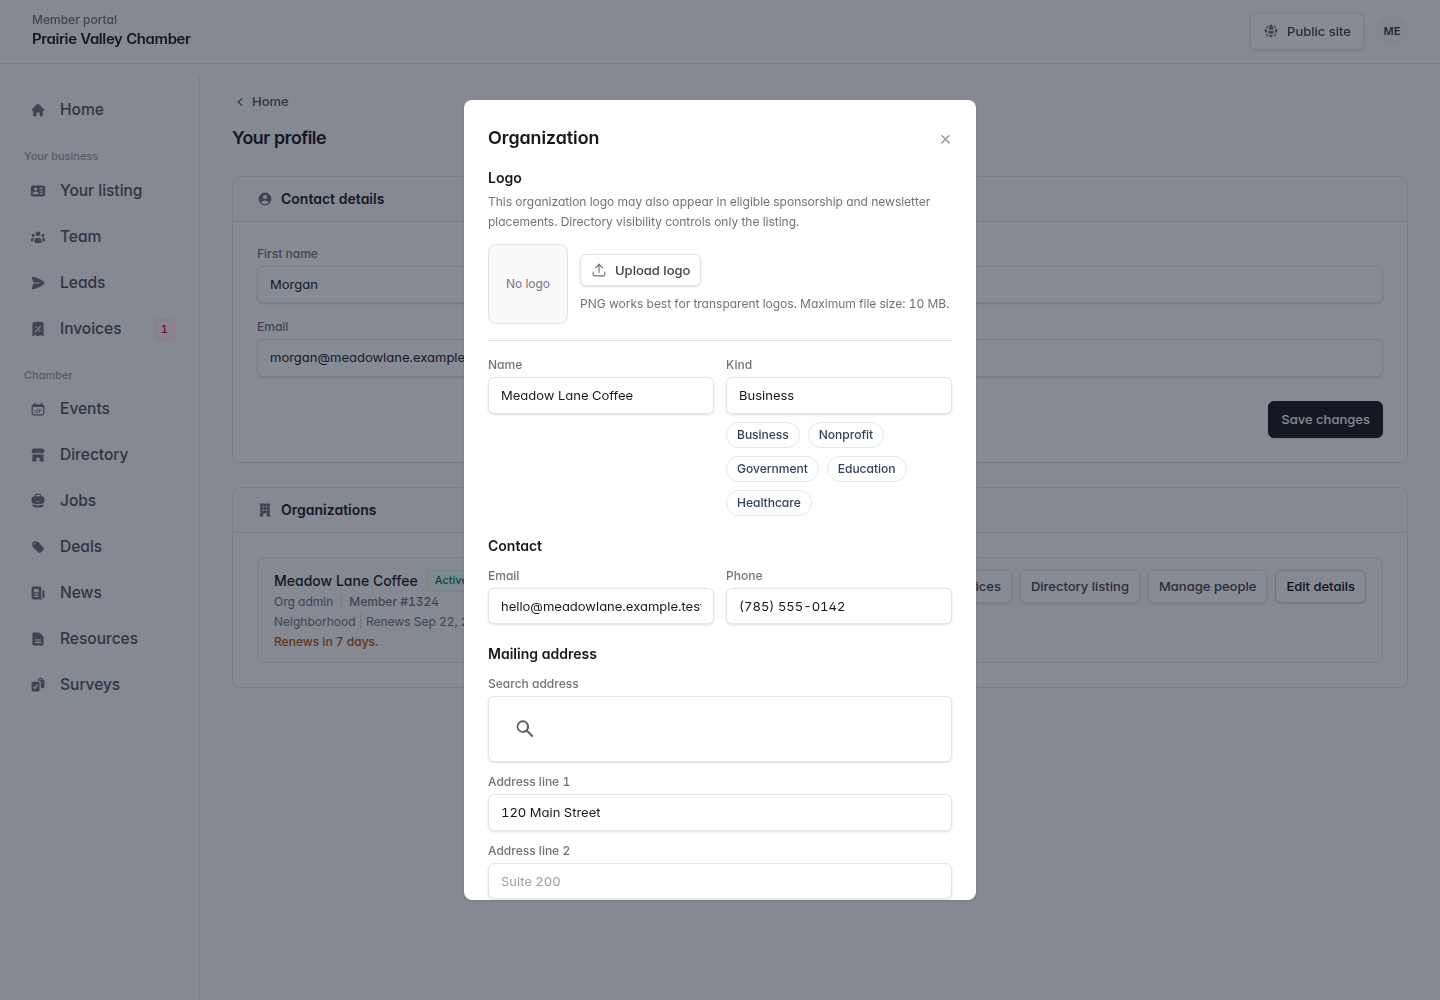
Edit details changes the company record. Choose the image to enlarge -
Check the company and billing addresses
Scroll down to review the street address, city, state, and ZIP code. Use the separate billing address fields when invoices should use a different address.
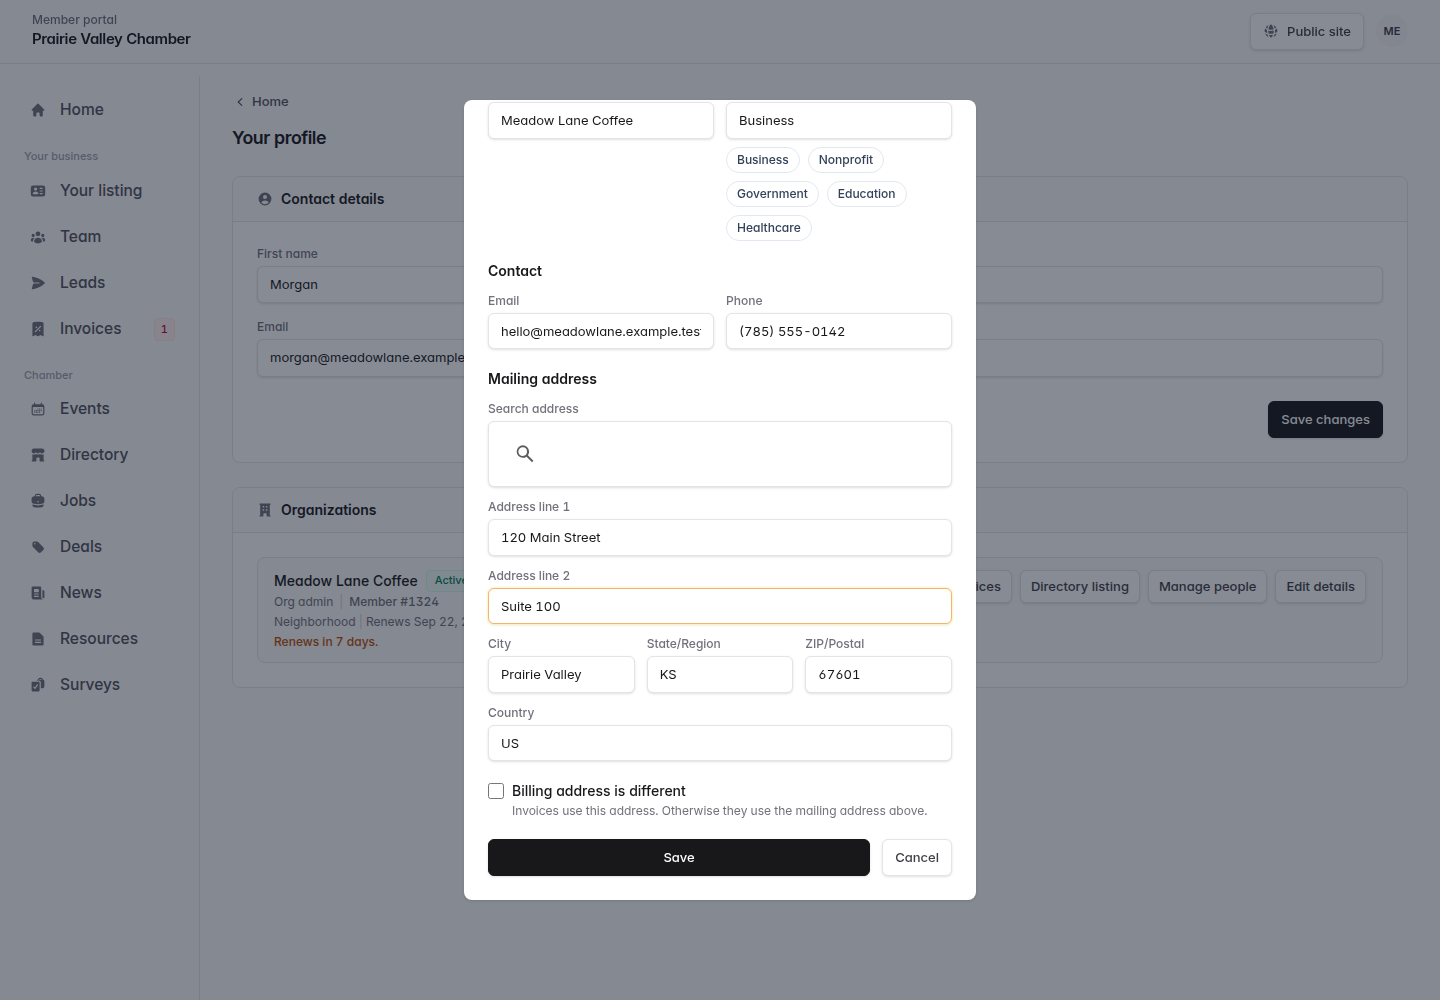
The Save button is at the bottom of Edit details. Choose the image to enlarge -
Save and check the company record
Select Save. Check that you updated the intended company and that the details are correct.
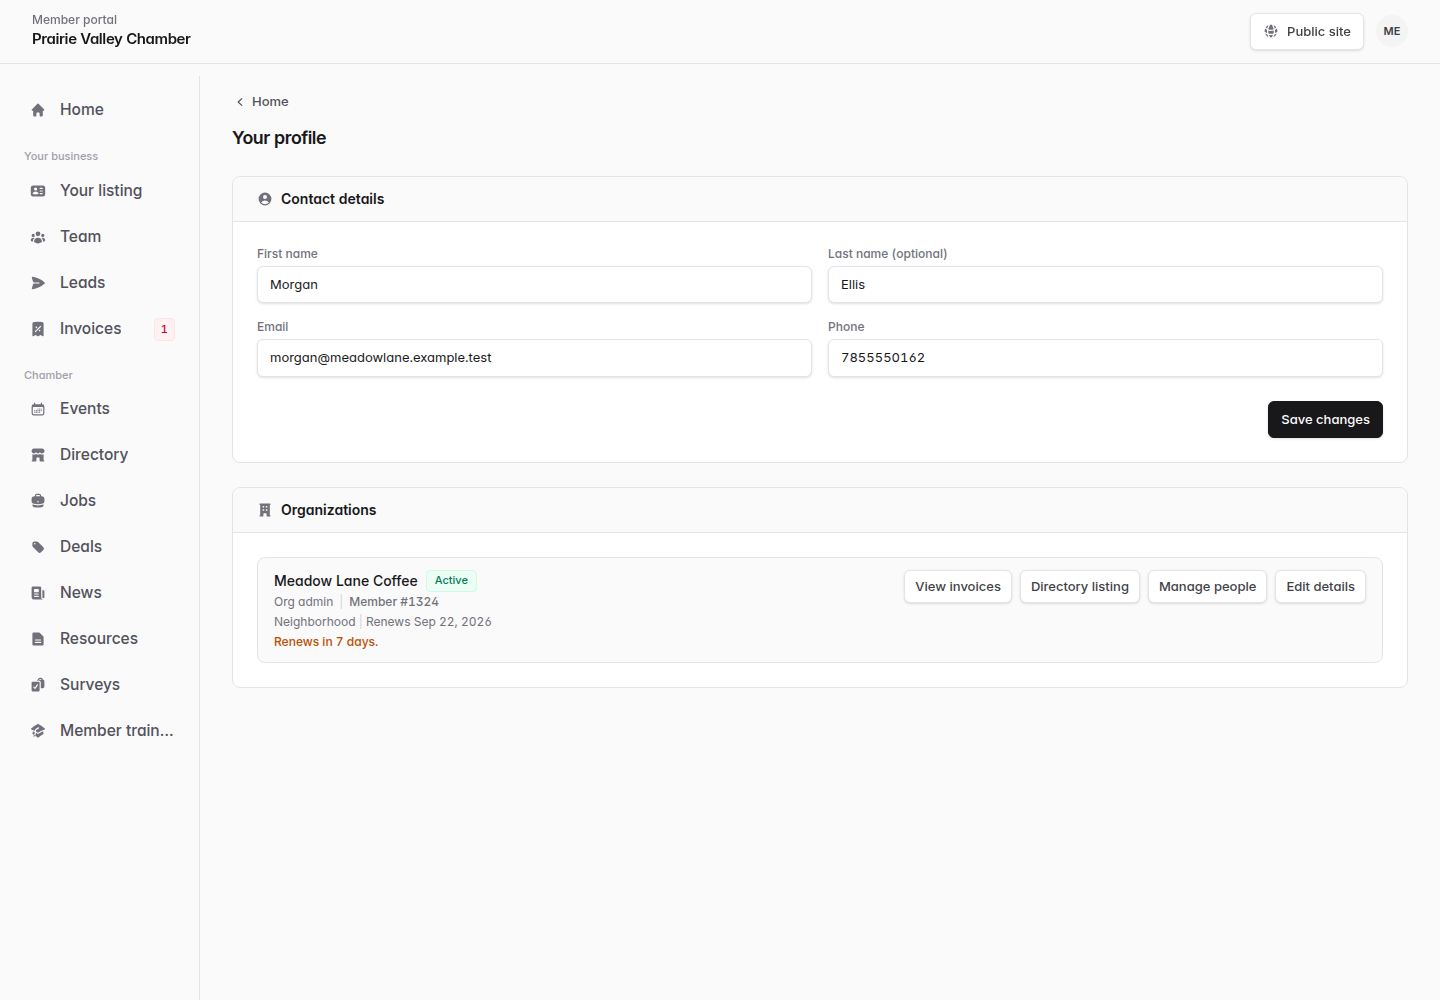
Your company details are saved separately from your personal profile. Choose the image to enlarge -
Update the directory listing
Choose Directory listing to edit your description, categories, website, directory contact information, hours, and other available fields.
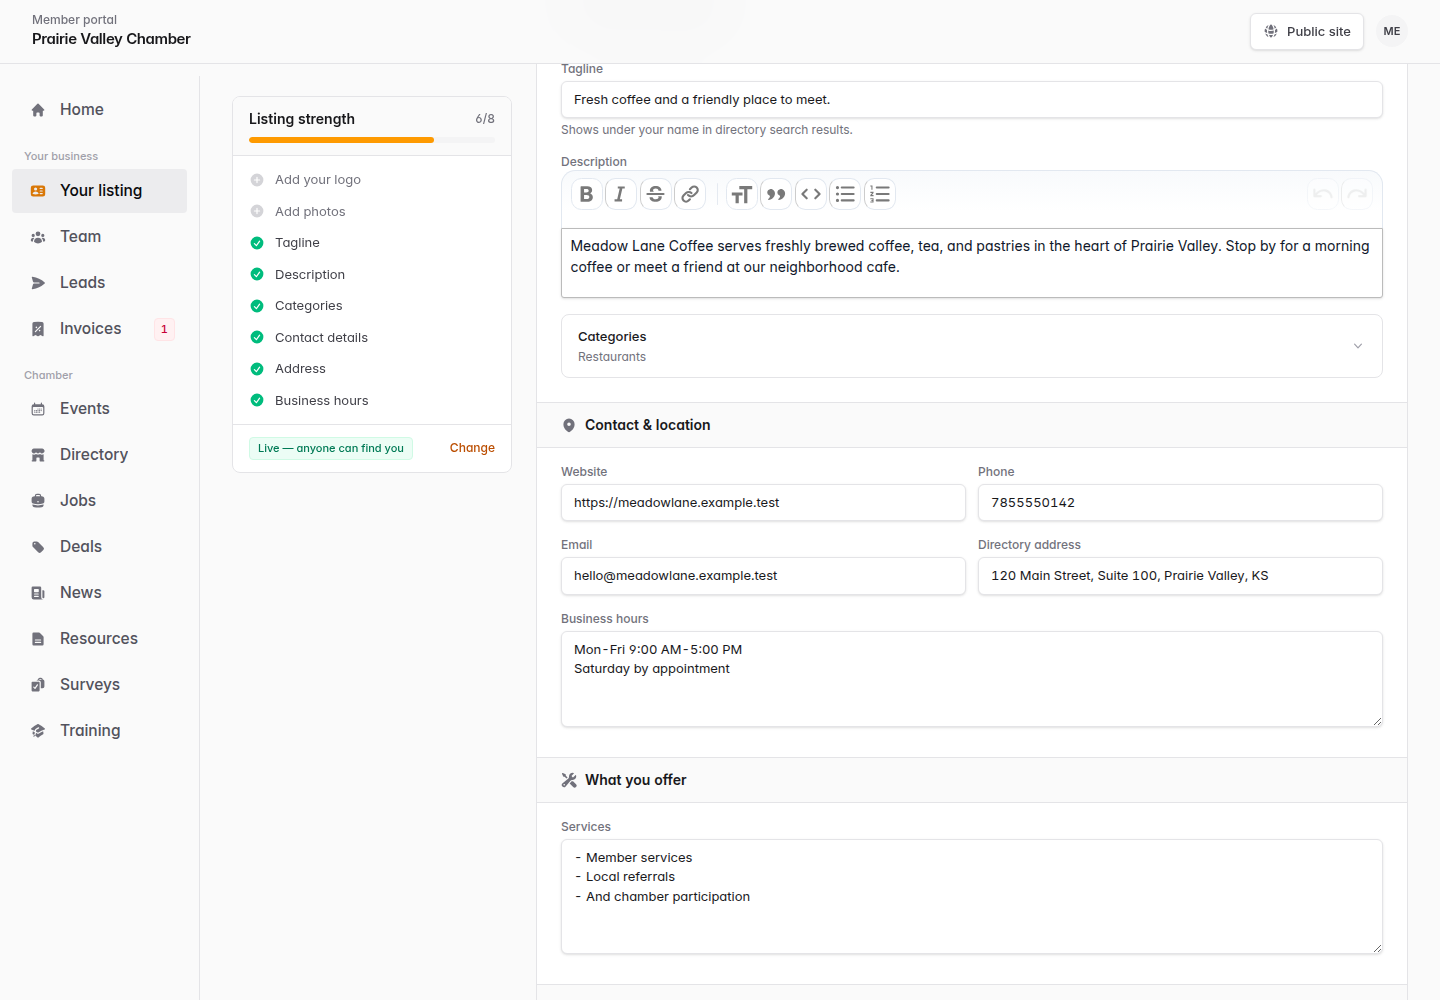
Keep the details visitors use to find and contact your company current. Choose the image to enlarge -
Review visibility and save your listing
Scroll down to choose who can see your listing and which contact details are public. Select Save changes. Choose See your listing when it is available to review the result.
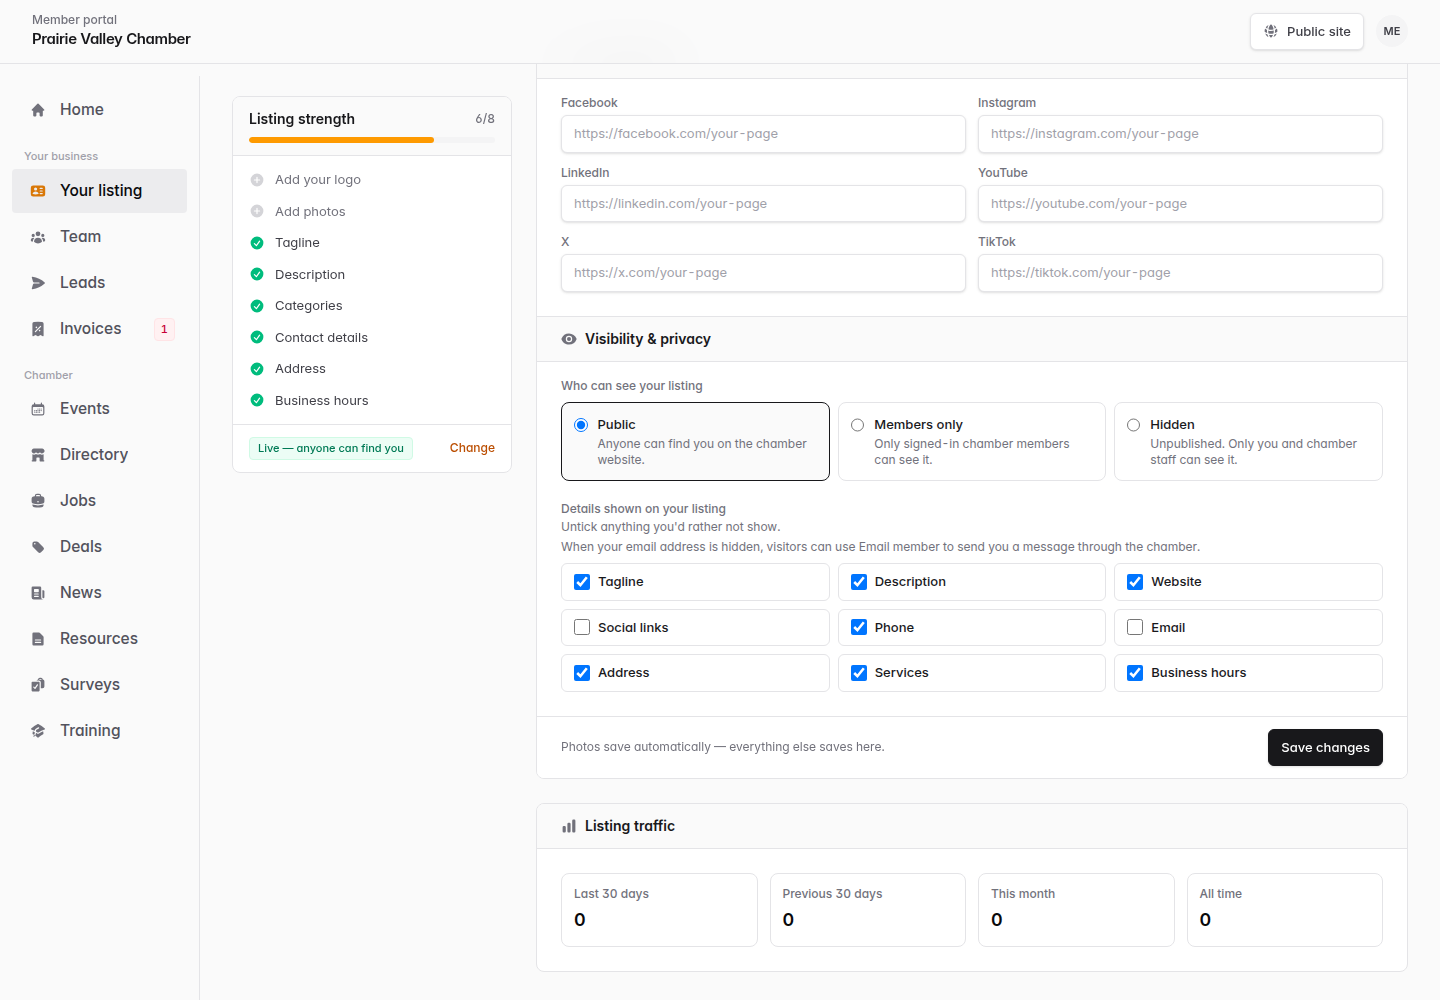
Review your visibility choices before saving the listing. Choose the image to enlarge
Add or update people at your company
Give coworkers their own member access and keep company contacts current.
Add or update people at your company
Give coworkers their own member access and keep company contacts current.Company admins
A person’s job role is separate from admin permission. If an email or contact field is locked, ask your chamber to update it safely.
-
Open Manage people
Open the menu with your initials and select Profile. Find your company under Organizations and select Manage people. Review Company people before adding someone who may already be listed.
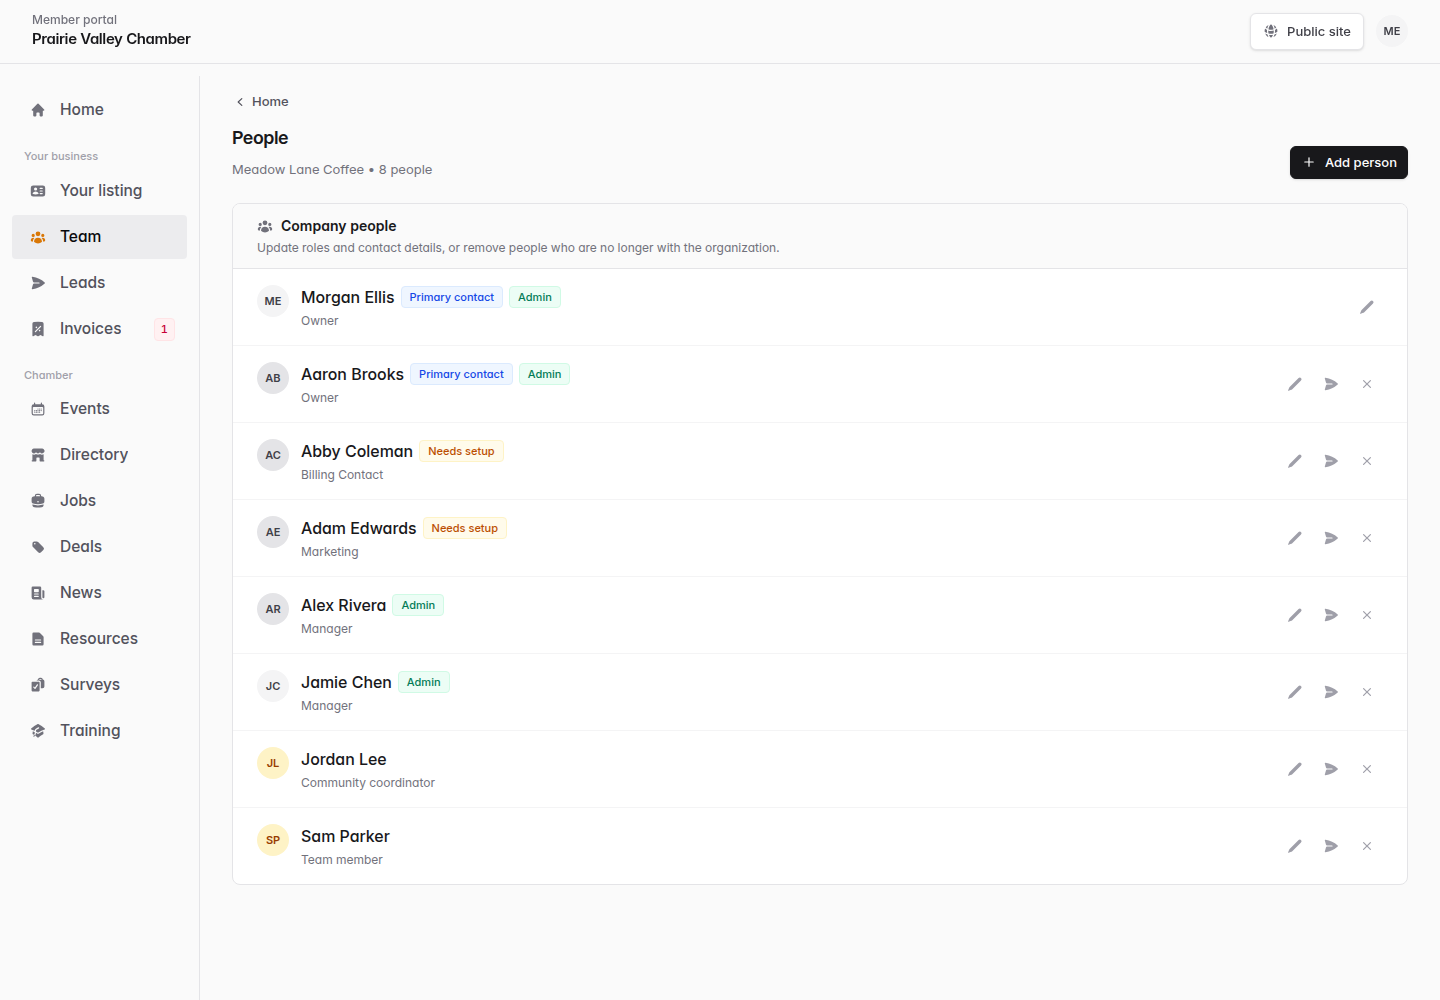
Check the existing company contacts first. Choose the image to enlarge -
Add your coworker
Select Add person. Enter their name and work email, then add their phone number and role if useful. Select Add person to save them and send a portal setup email.
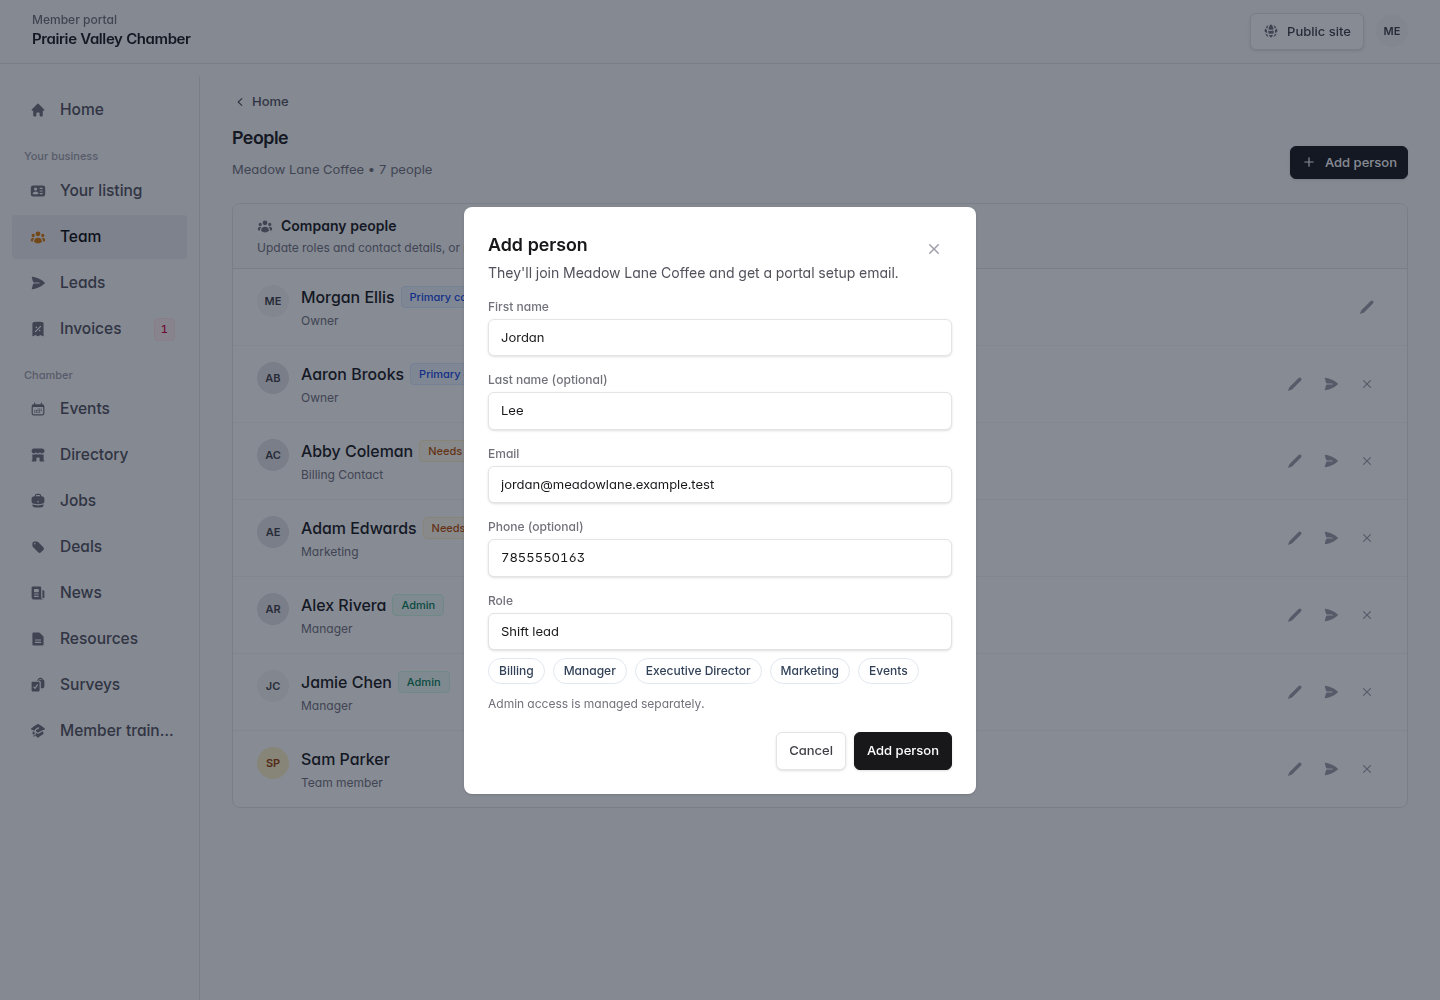
Use the coworker’s own email so they can sign in separately. Choose the image to enlarge -
Check the new contact
Confirm that the person appears in Company people. Ask them to follow the setup email. If they need help receiving it, use the available setup action or contact your chamber.
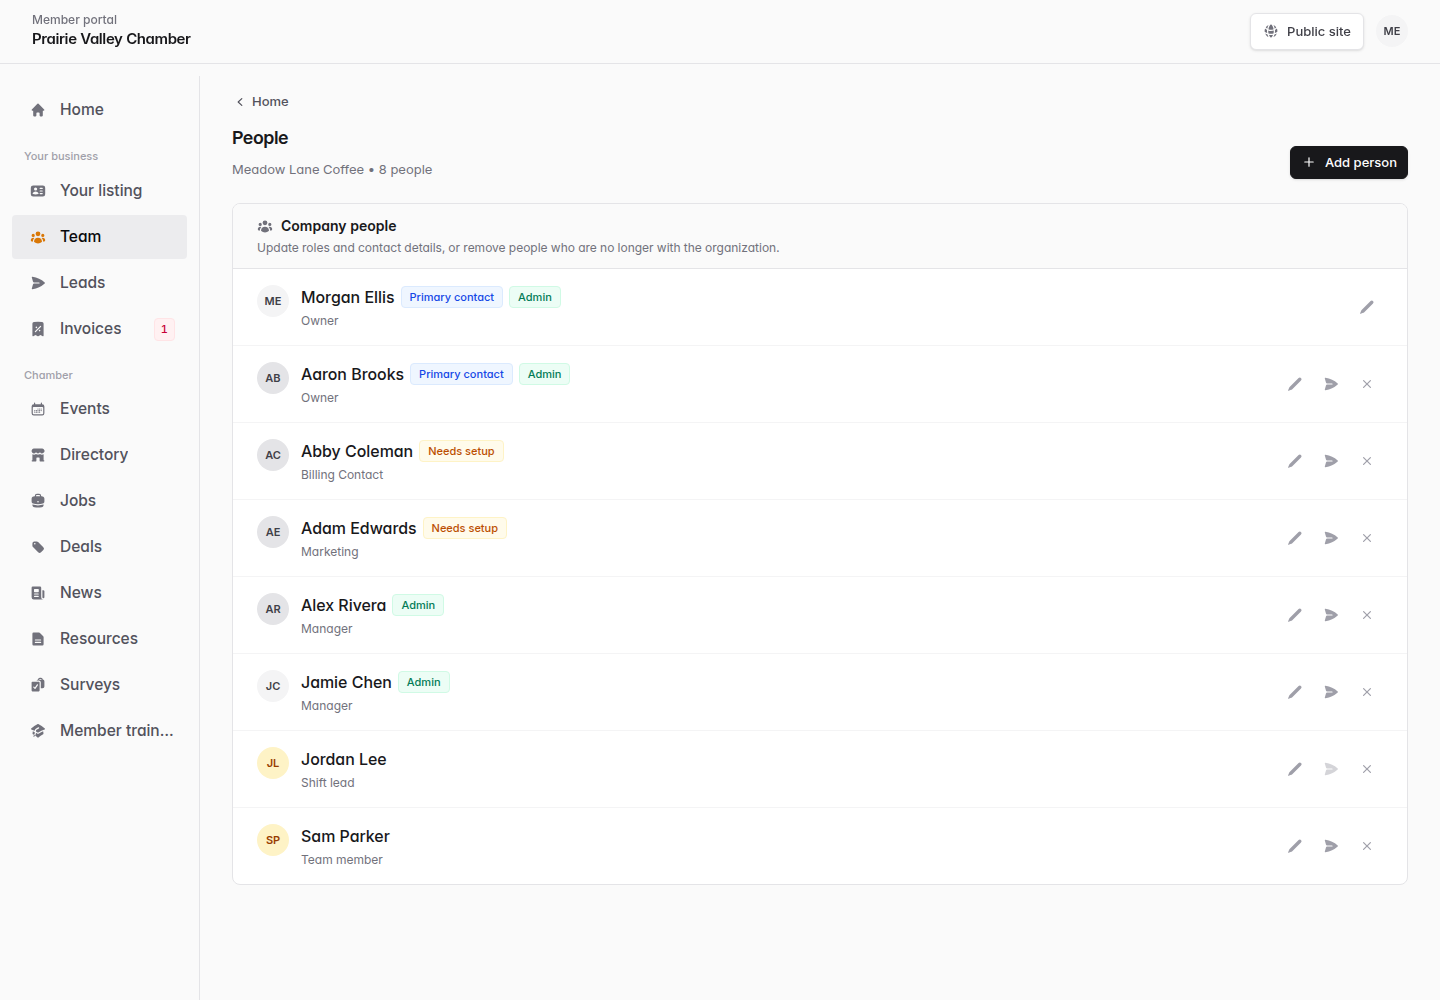
Adding a person connects them to this company. Choose the image to enlarge -
Edit an existing person
Select the pencil beside the person. Update the fields you can edit and select Save changes. Fields shared with another organization or connected to sign-in may require help from chamber staff.
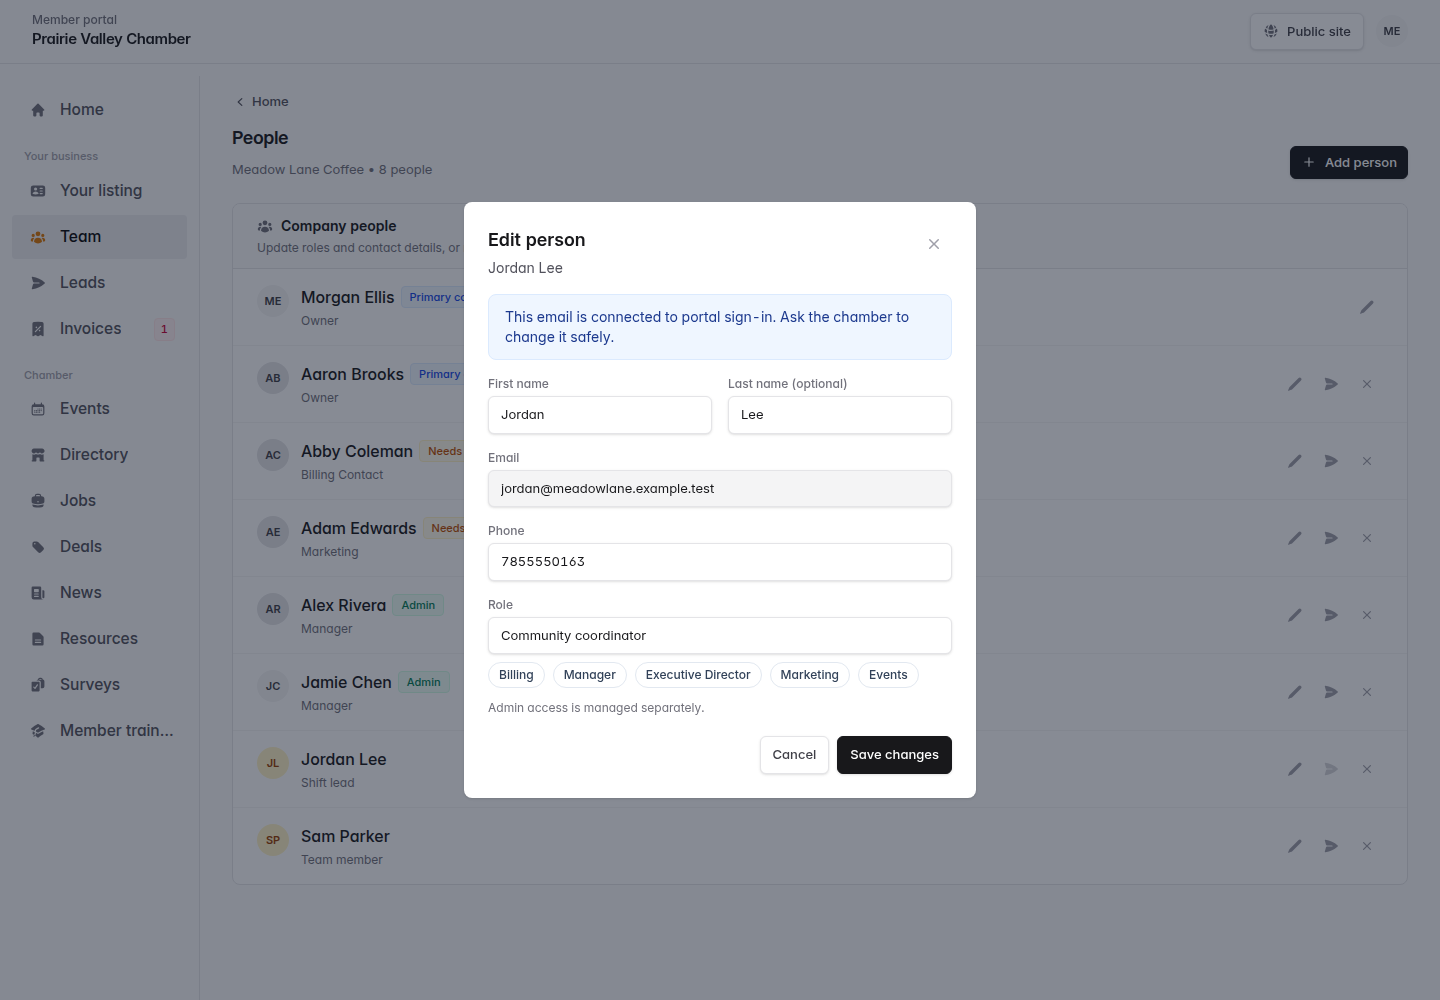
The edit dialog explains any fields you cannot change yourself. Choose the image to enlarge -
Check the updated person
Review the person’s row in Company people to confirm that the updated contact details or role were saved.
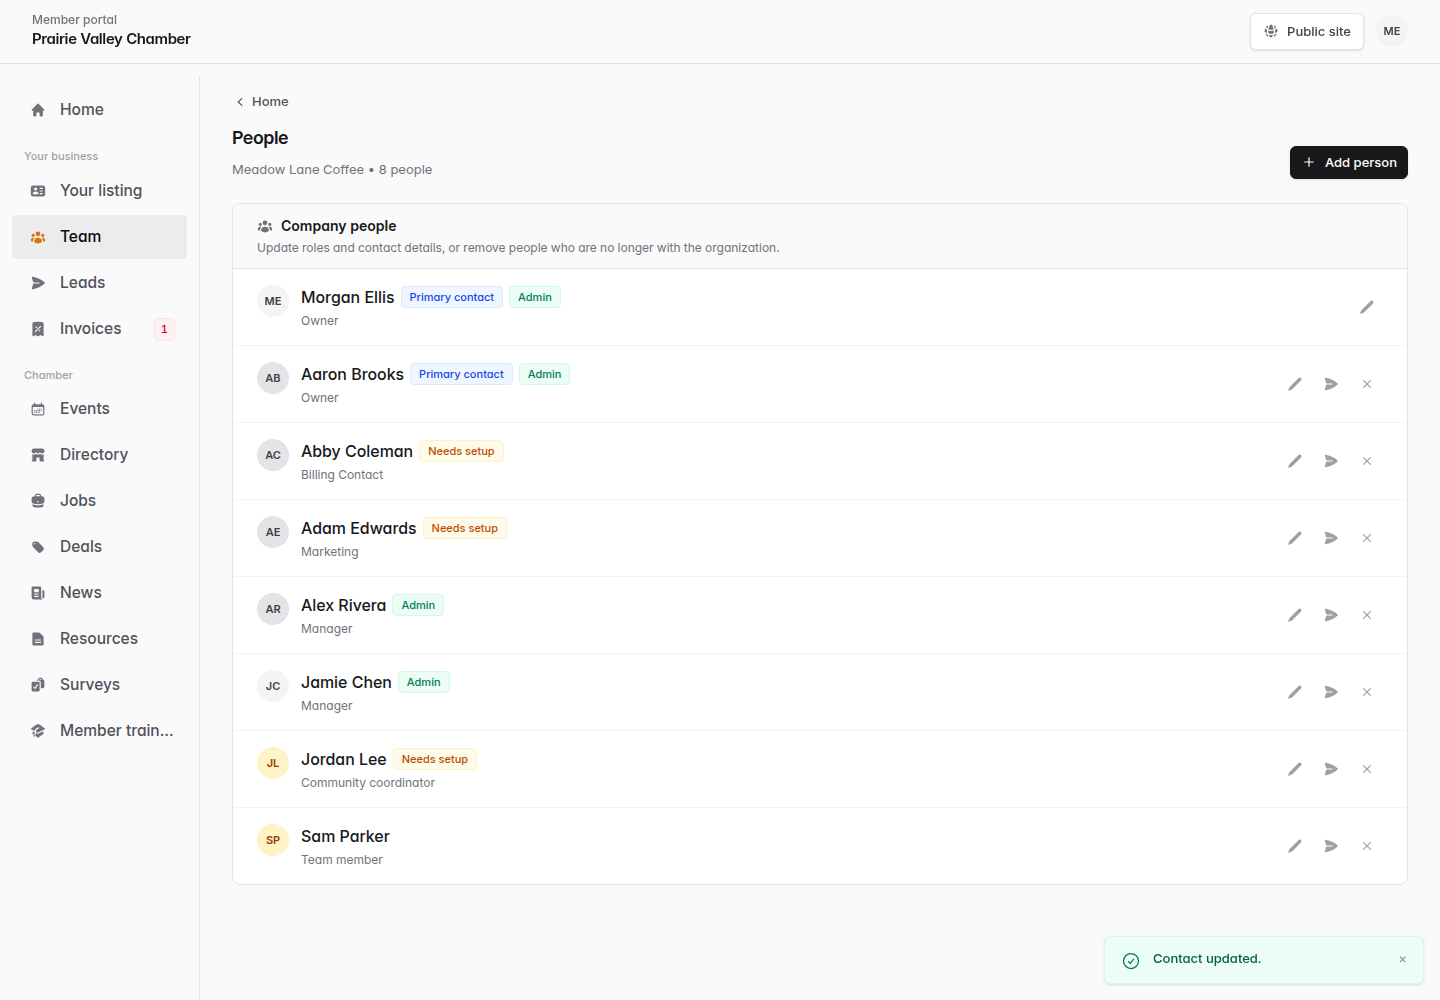
The saved role appears beside the person’s name. Choose the image to enlarge -
Remove someone who has left the company
Select the X beside the person and check the name in the confirmation. Select Remove person to remove their connection to this company, or Cancel to keep them. They may still have access through another company they belong to.
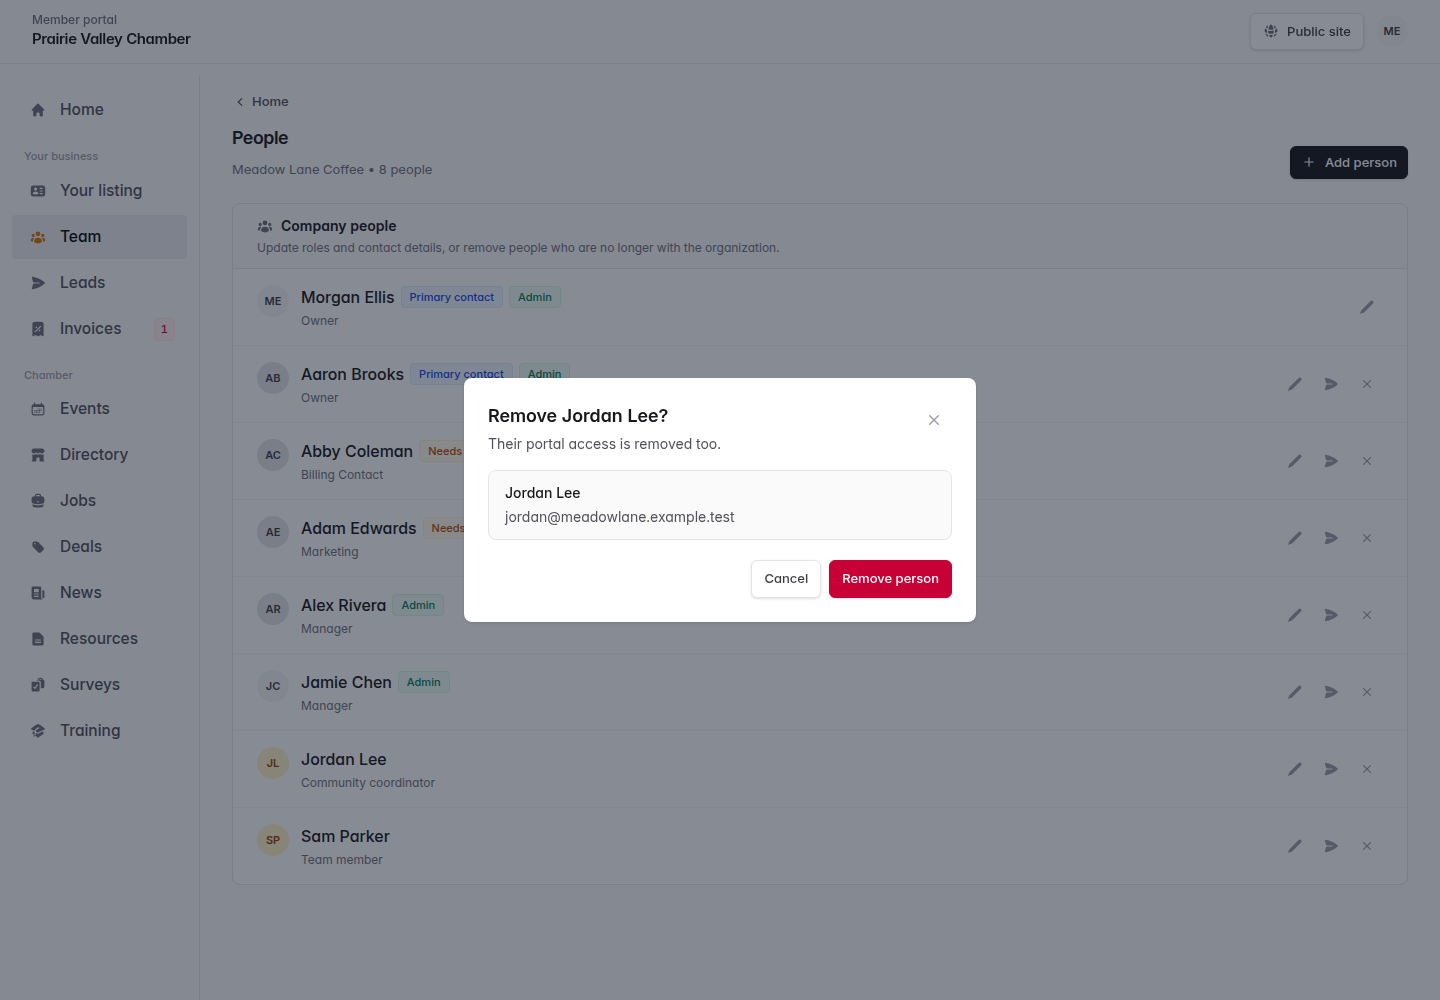
Check the person and company before confirming removal. Choose the image to enlarge
Register for an event
Choose tickets, add attendees, and check your registration.
Register for an event
Choose tickets, add attendees, and check your registration.Sign in first to receive any member pricing you qualify for. Ticket choices, guest questions, and payment options depend on the event.
-
Choose your event
Open Events and select the event you want to attend. Review the date, time, location, and registration details. Choose Continue to registration when it is shown; this may open the event’s public registration page.
-
Choose tickets and enter attendee details
Select your ticket type and number of tickets. Check your contact information and add the requested guest details. Review the total before selecting Register or continuing to payment.
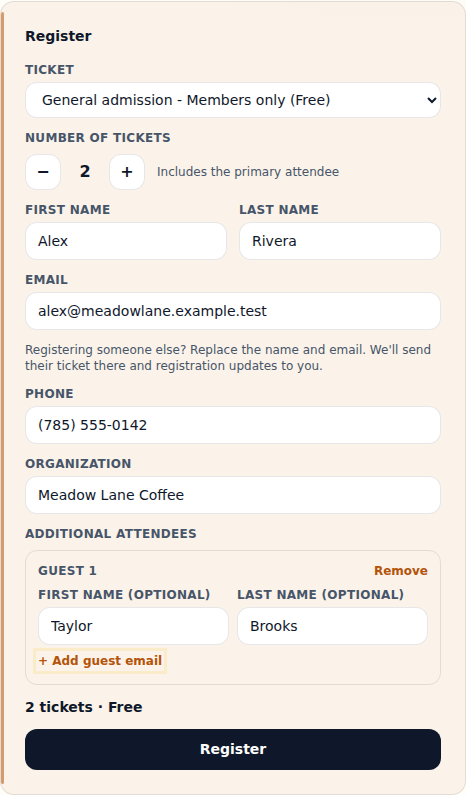
This example registers two attendees for a free event. Choose the image to enlarge -
Confirm your registration
For a paid event, complete payment before leaving checkout. Check the confirmation page and email for your attendees and event details. If payment is still due, follow the instructions shown to finish registering.
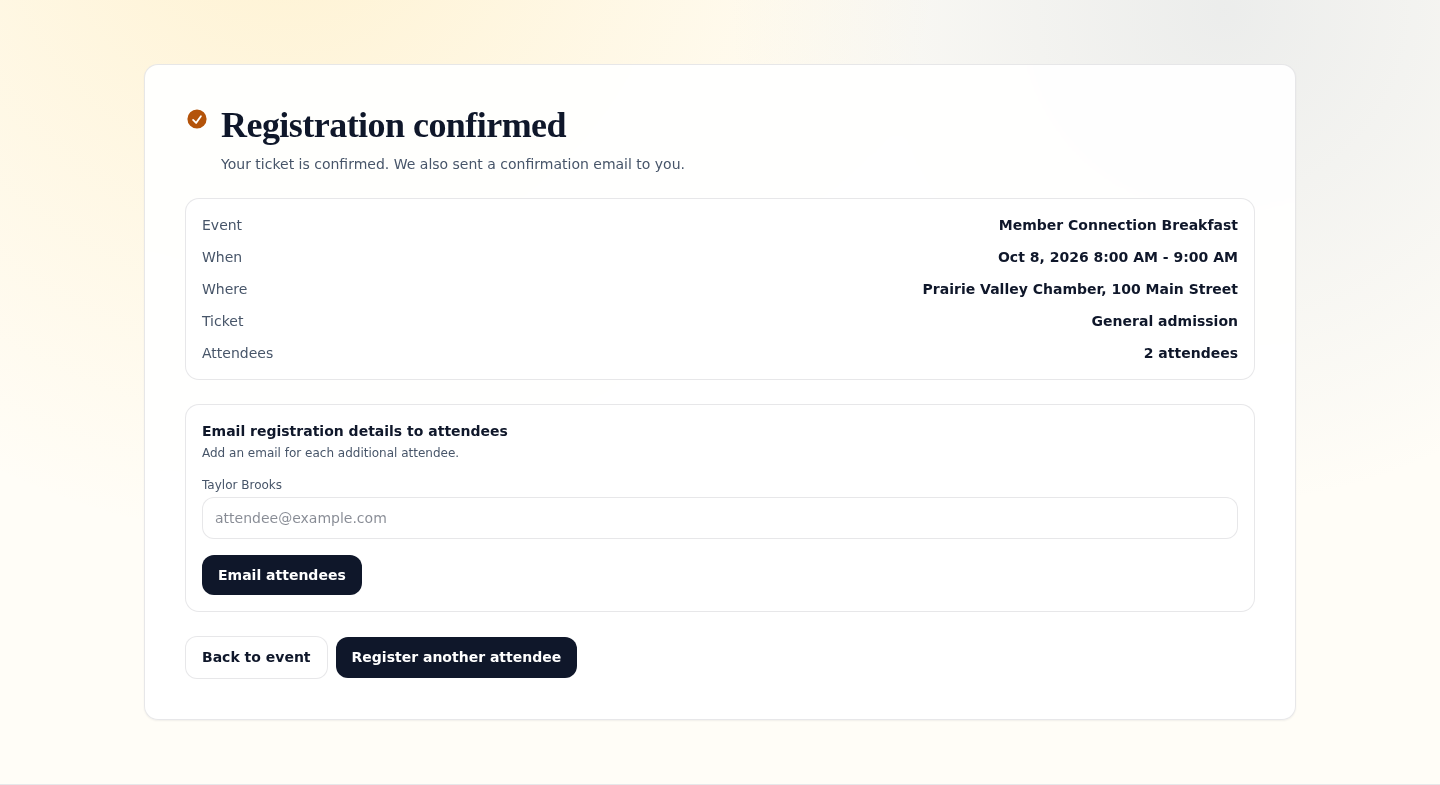
The confirmation page shows the result of your registration. Choose the image to enlarge
Post a job opening
Share an opening and tell applicants how to apply.
Post a job opening
Share an opening and tell applicants how to apply.Members with job posting access
Posting access depends on your chamber and membership. If you do not see a posting button, contact your chamber.
-
Start a job post
Open Jobs and select + Post. Check that the correct company is selected if you manage more than one.
-
Describe the opening
Enter the title, location, Apply link, summary, and details. Add a closing date and image if needed. Choose Draft to finish later or Published when the post is ready, then select Save.
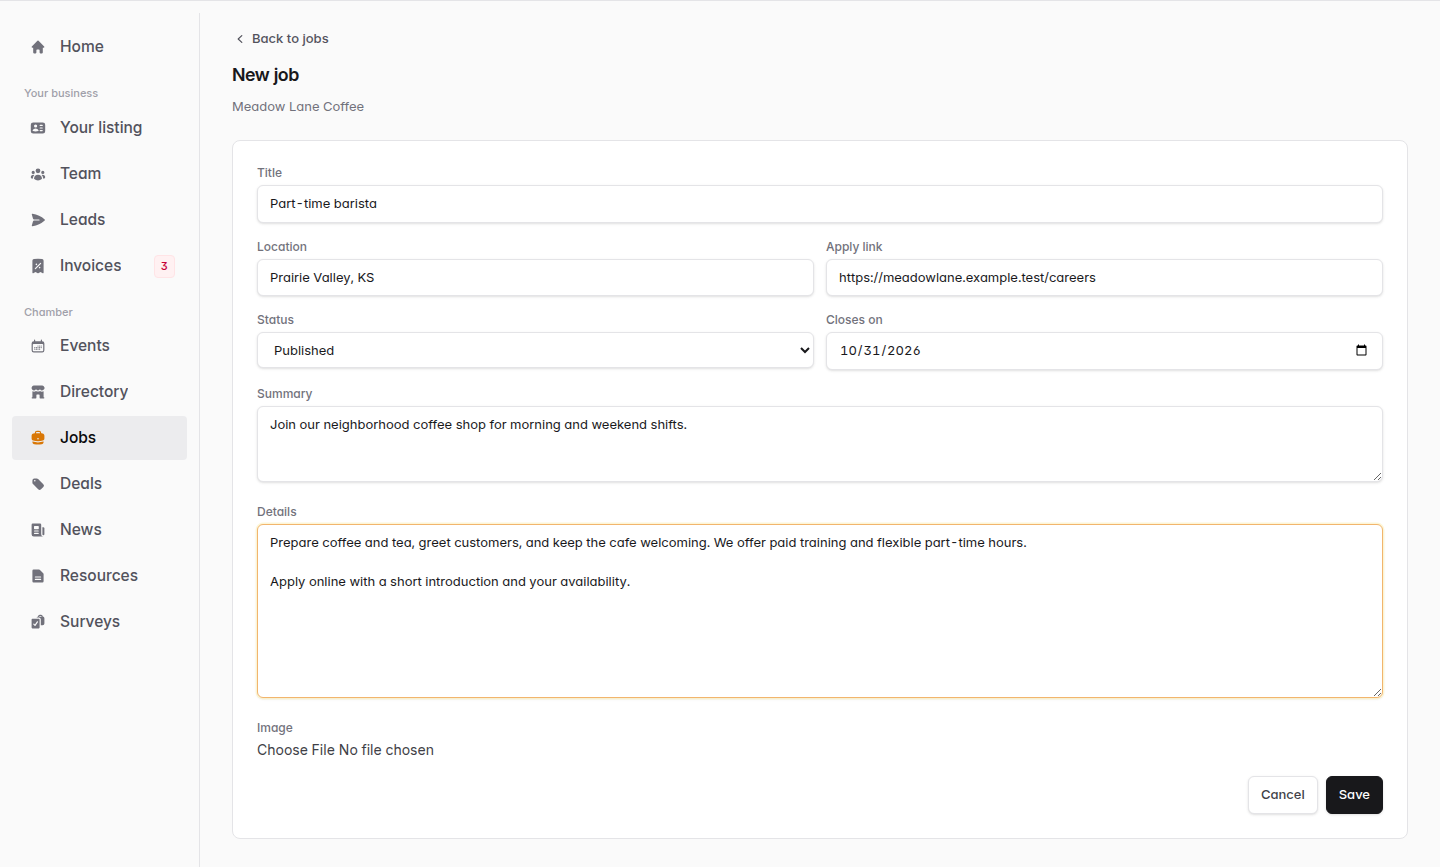
Give applicants a clear description and a working application link. Choose the image to enlarge -
Review the saved post
Open your post from Jobs and check its details. Use Edit to make corrections or change its status when the position is filled.
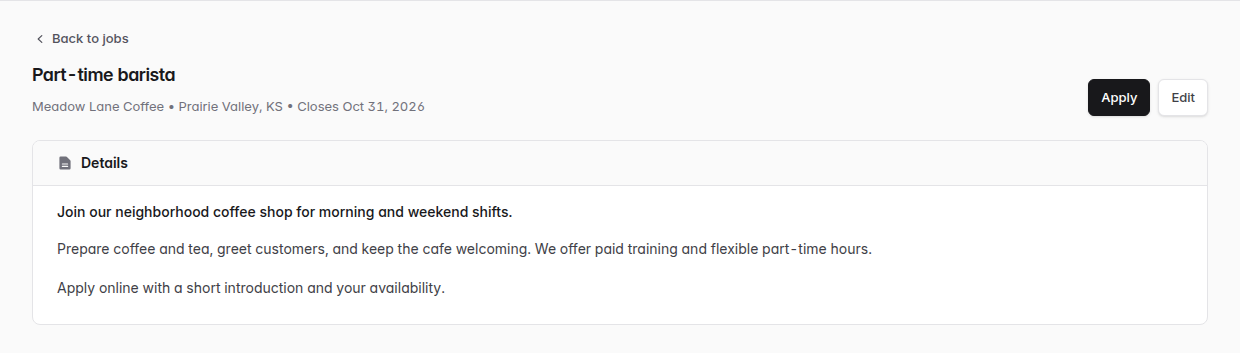
Review the job as readers will see it. Choose the image to enlarge
Share a member offer or business bulletin
Use Deals for a member offer, discount, or promotion.
Share a member offer or business bulletin
Use Deals for a member offer, discount, or promotion.Members with deal posting access
Deals are for member offers and promotions. A separate Business Bulletins page or newsletter does not update automatically when you save a Deal. Follow your chamber’s submission instructions for those bulletins.
-
Open Deals
Select Deals in your member account and choose + Deal. If the option is unavailable, ask your chamber how to submit an offer.
-
Explain the offer
Enter the Title, Ends on date, Redeem link, Summary, and Details. Explain who can use the offer and any conditions. Choose Draft to finish later or Published when ready, then select Save.
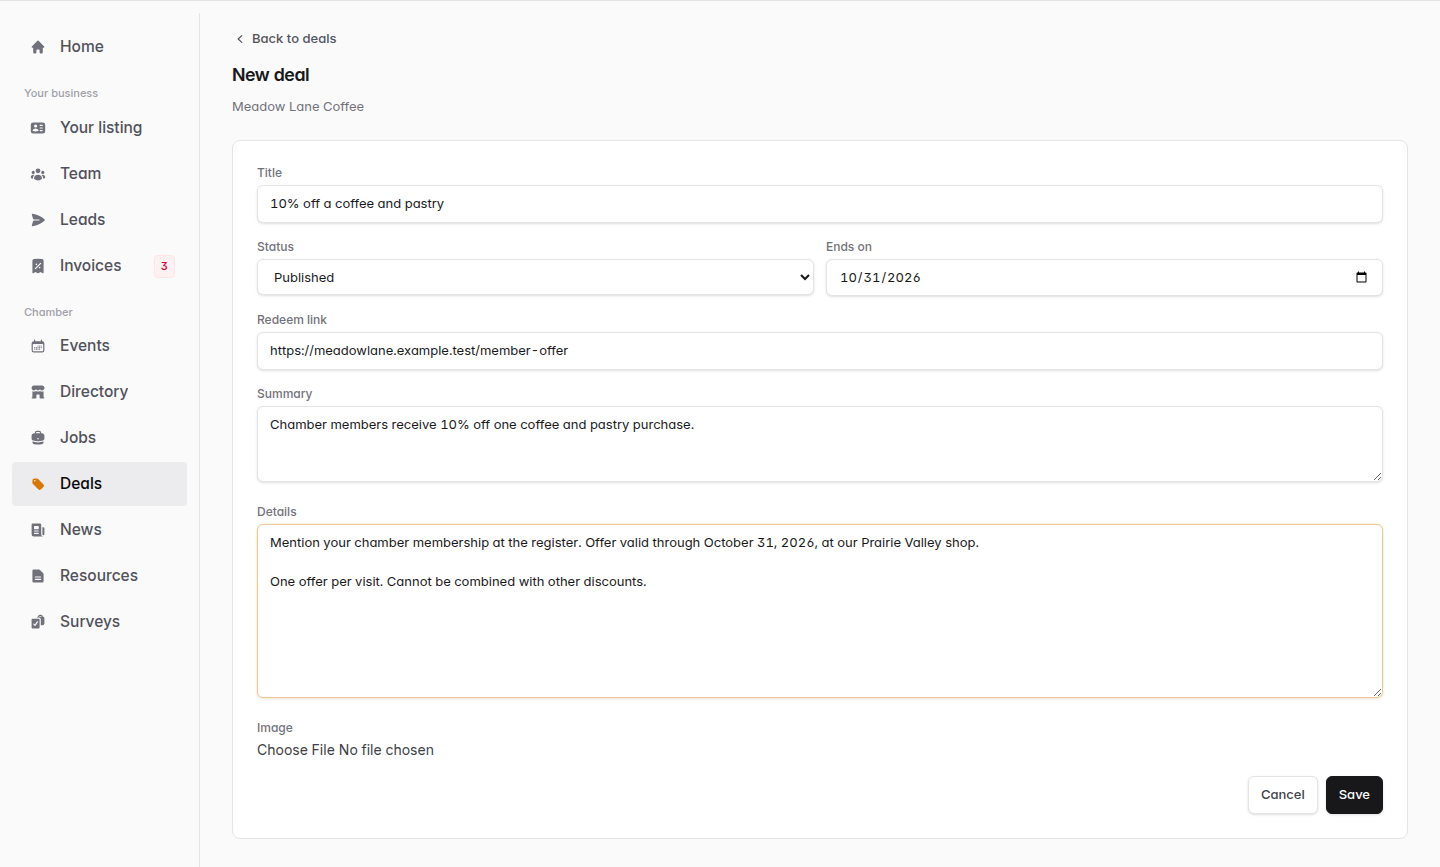
Include an expiration date and clear redemption instructions. Choose the image to enlarge -
Check the saved offer
Open your offer in Deals and check the details. Use Edit to correct it or update its status when it is no longer available.
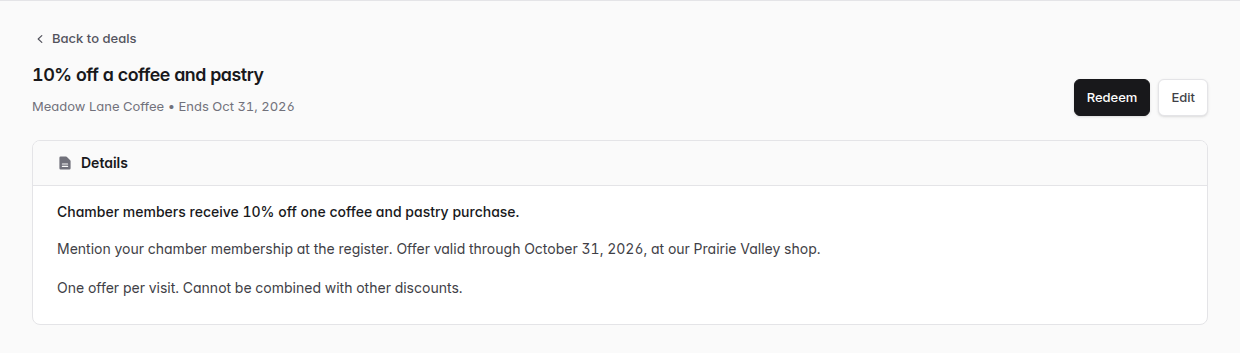
Review the offer in Deals after saving. Choose the image to enlarge
Post company news
Write an article about your company and review its publication status.
Post company news
Write an article about your company and review its publication status.Members with news posting access
News must be enabled by your chamber. Publishing here does not automatically send an email or update a separate website’s News page. Contact your chamber when the article needs to appear there.
-
Start an article
Open News and select + Article. Check that you are posting for the correct company.
-
Write and review your news
Enter the Title, an optional Summary, and your article in Body. Use the editor for formatting, links, and images. Choose Draft to finish later or Published when the article is ready, then select Save.
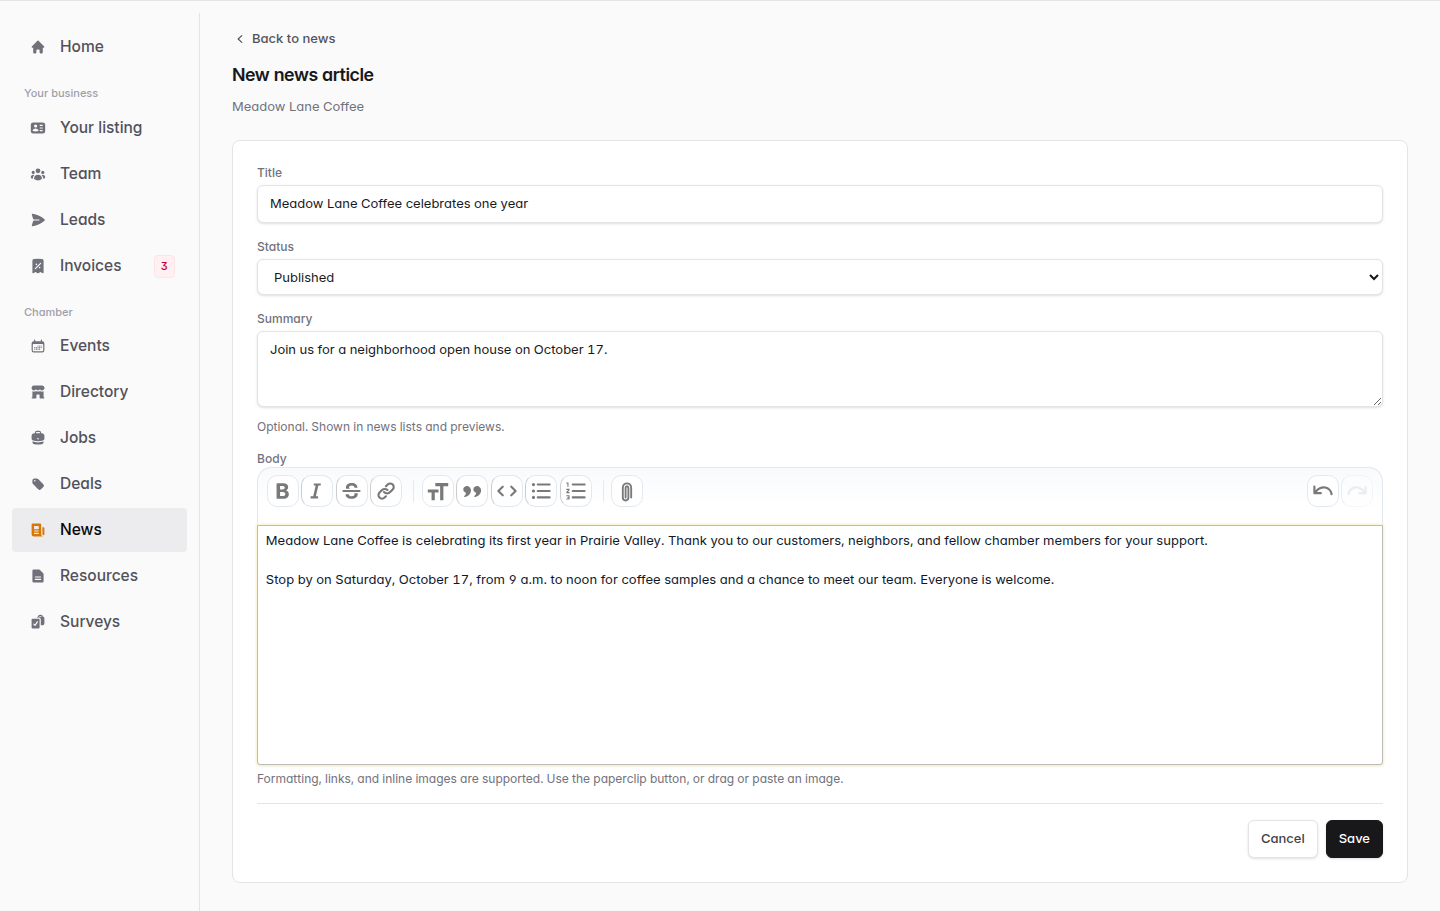
Check names, dates, and links before publishing. Choose the image to enlarge -
Check its status
Open the published article from News and review it. Select Edit to make corrections. If you saved a draft, finish it in the editor and choose Published when you want it to appear in News.
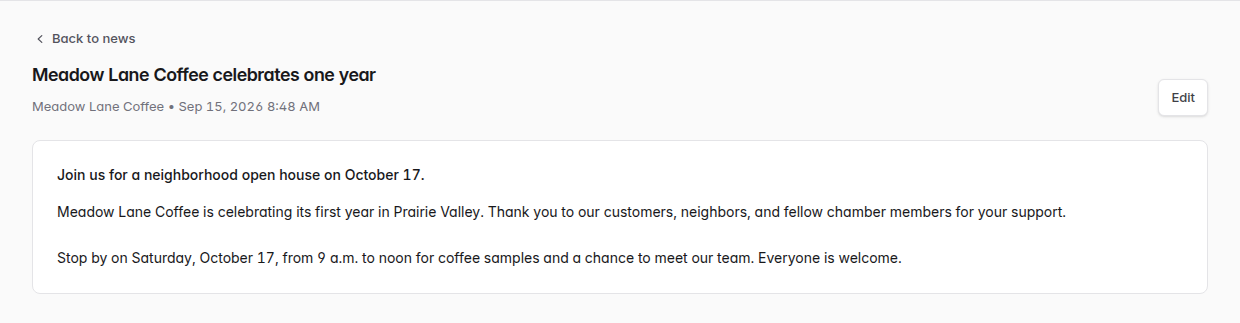
Published articles appear in the chamber’s enabled News area. Choose the image to enlarge
View and pay invoices
Find unpaid invoices, review charges, and make a payment.
View and pay invoices
Find unpaid invoices, review charges, and make a payment.-
Open Invoices
Select Invoices in your member account. Use To pay for outstanding invoices and History for previous invoices. If you manage multiple companies, check the company name on the invoice.
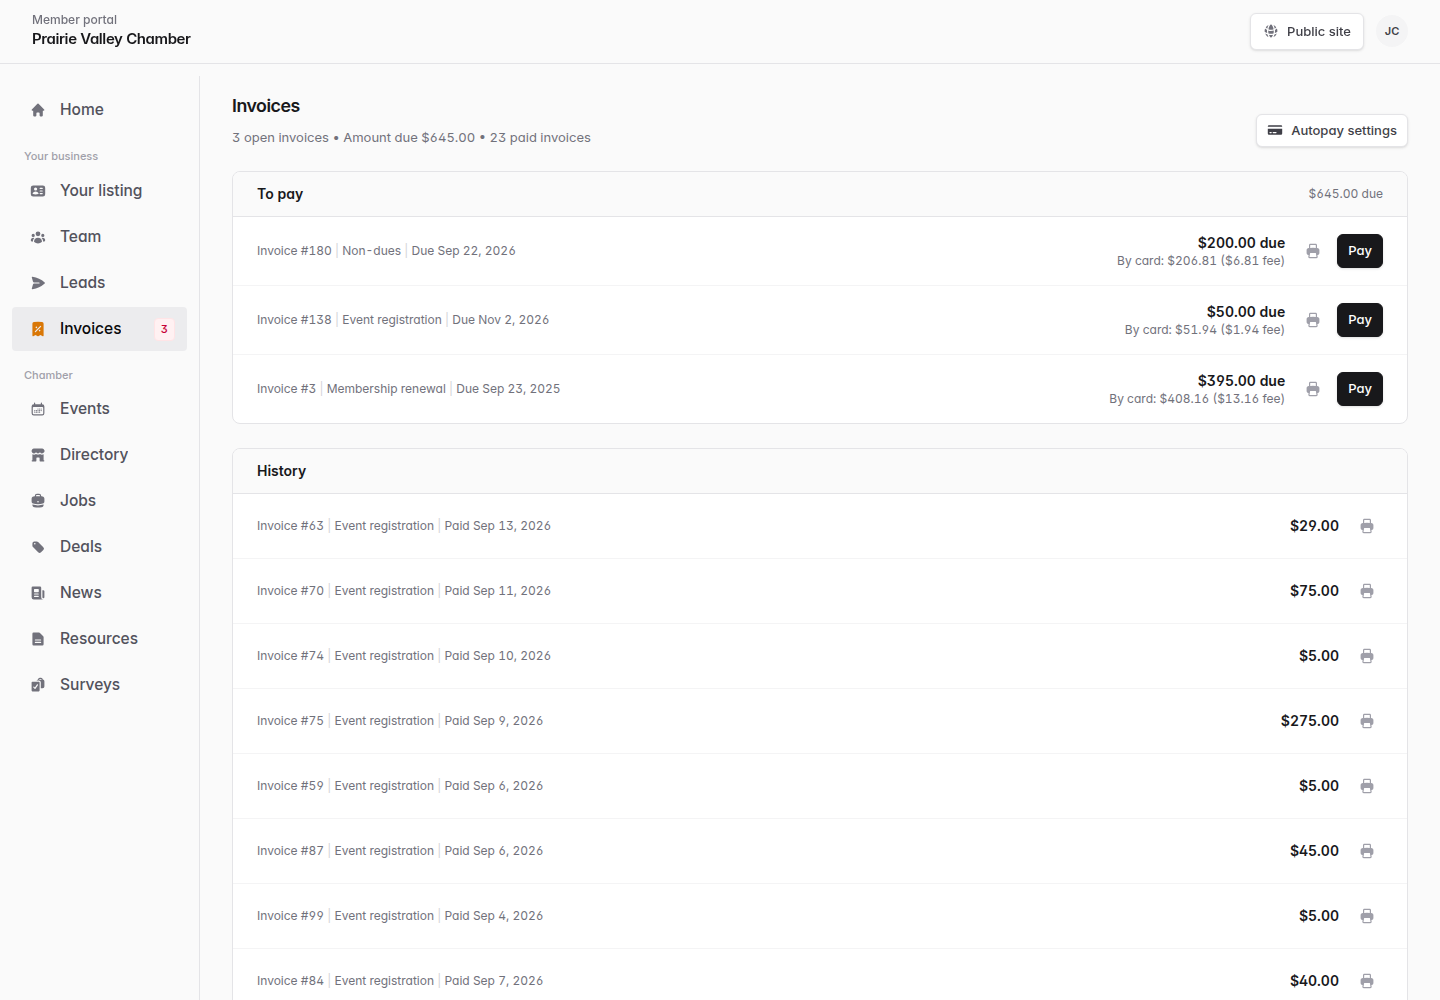
To pay and History separate outstanding invoices from previous activity. Choose the image to enlarge -
Review and pay an invoice
Use the print icon to review or print an invoice. Select Pay for the invoice you want to pay, then check the charges, remaining balance, and any fees. Enter your card details and select Pay now. Only select the optional membership autopay checkbox if you want to authorize future membership charges.
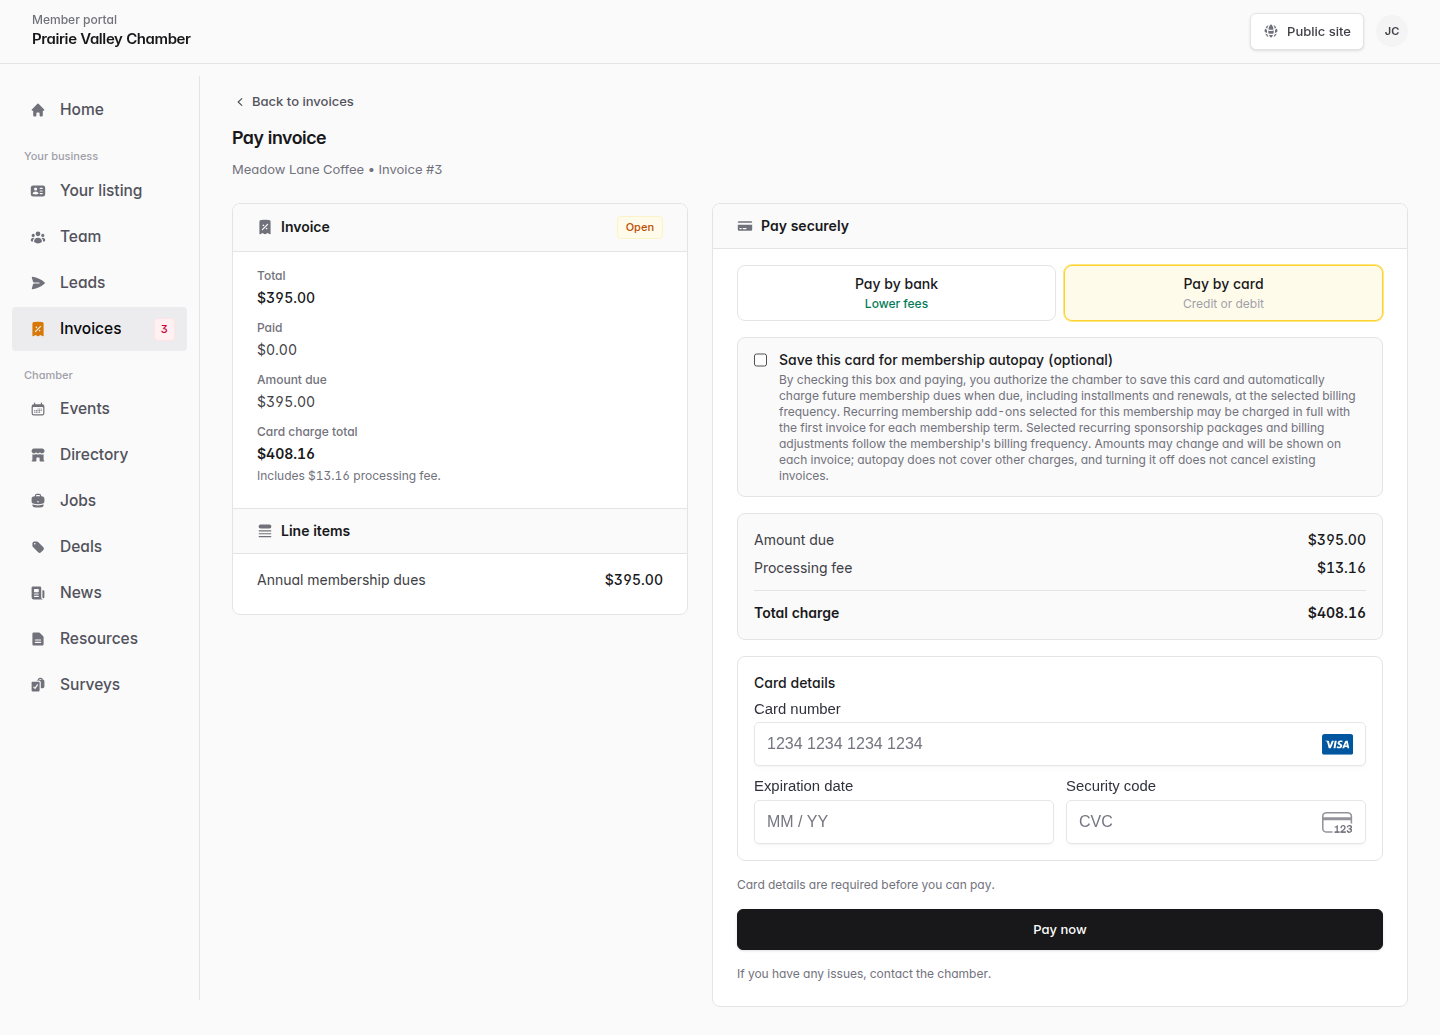
Review the total and payment options before paying. Choose the image to enlarge -
Check the payment result
Read the confirmation and check your email for the payment notice. Return to Invoices to review the updated balance. A bank payment may show as processing before it settles.
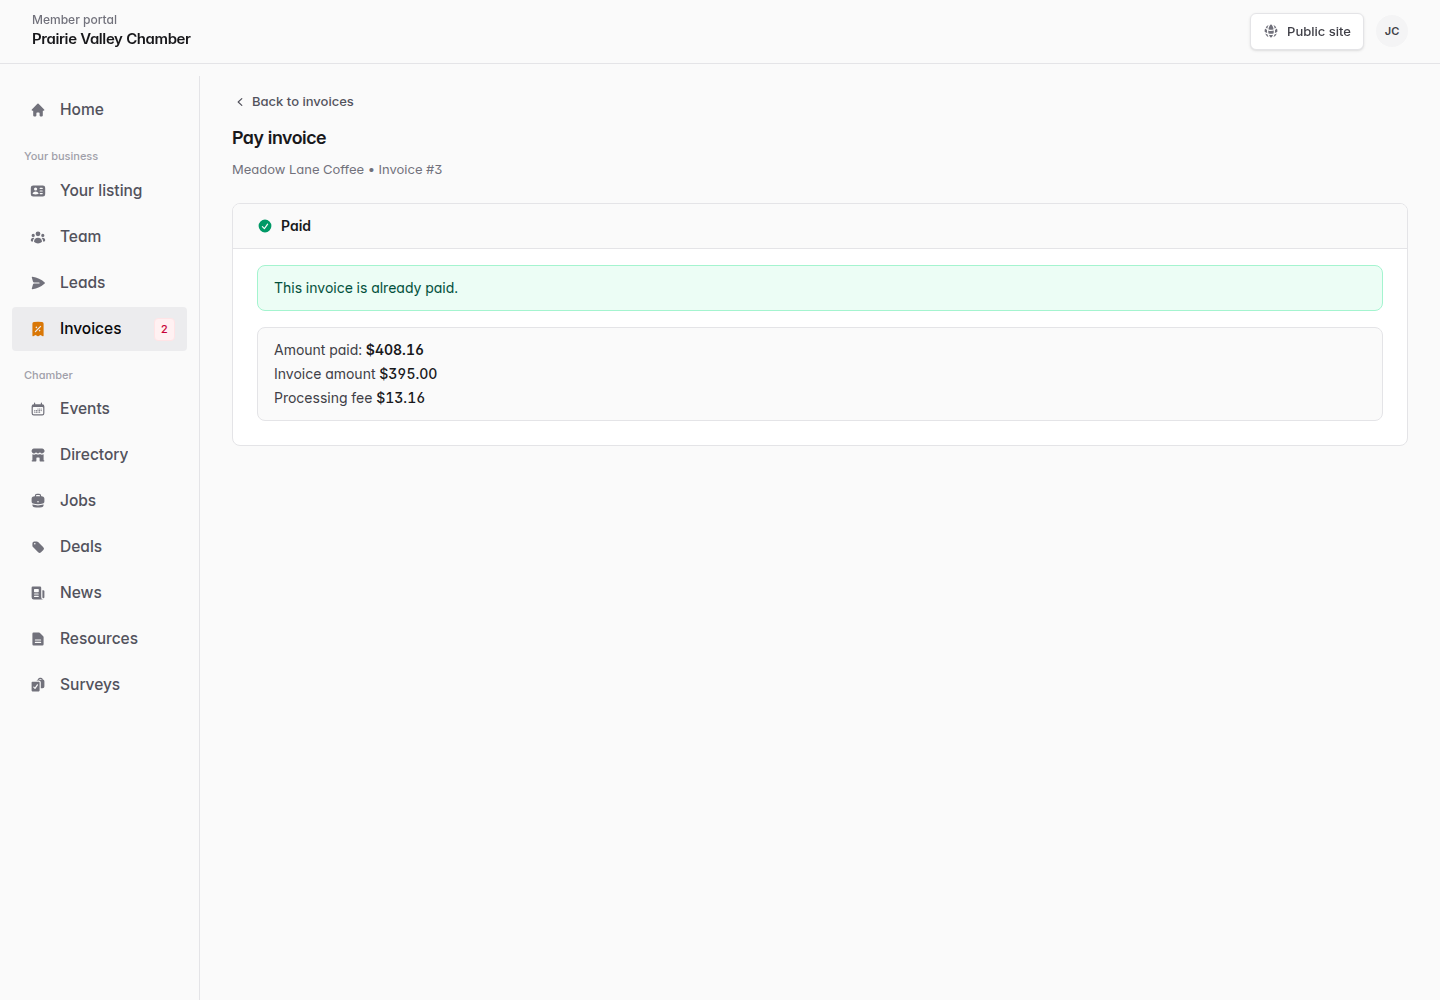
A successful card payment updates the invoice to Paid. Choose the image to enlarge
Add a bank account and pay by ACH
Add bank details while paying an eligible invoice.
Add a bank account and pay by ACH
Add bank details while paying an eligible invoice.Bank payments must be enabled by your chamber. One-time bank payments are available for eligible invoice balances of at least $100 and are not available for event registration invoices. Paying an invoice by bank does not turn on membership autopay. Use Autopay settings to authorize automatic membership payments.
-
Open the invoice payment page
From Invoices, select Pay on the invoice and choose Pay by bank. Enter your email and full name, then search for your bank. If Pay by bank is not offered, use an available payment method or contact your chamber.
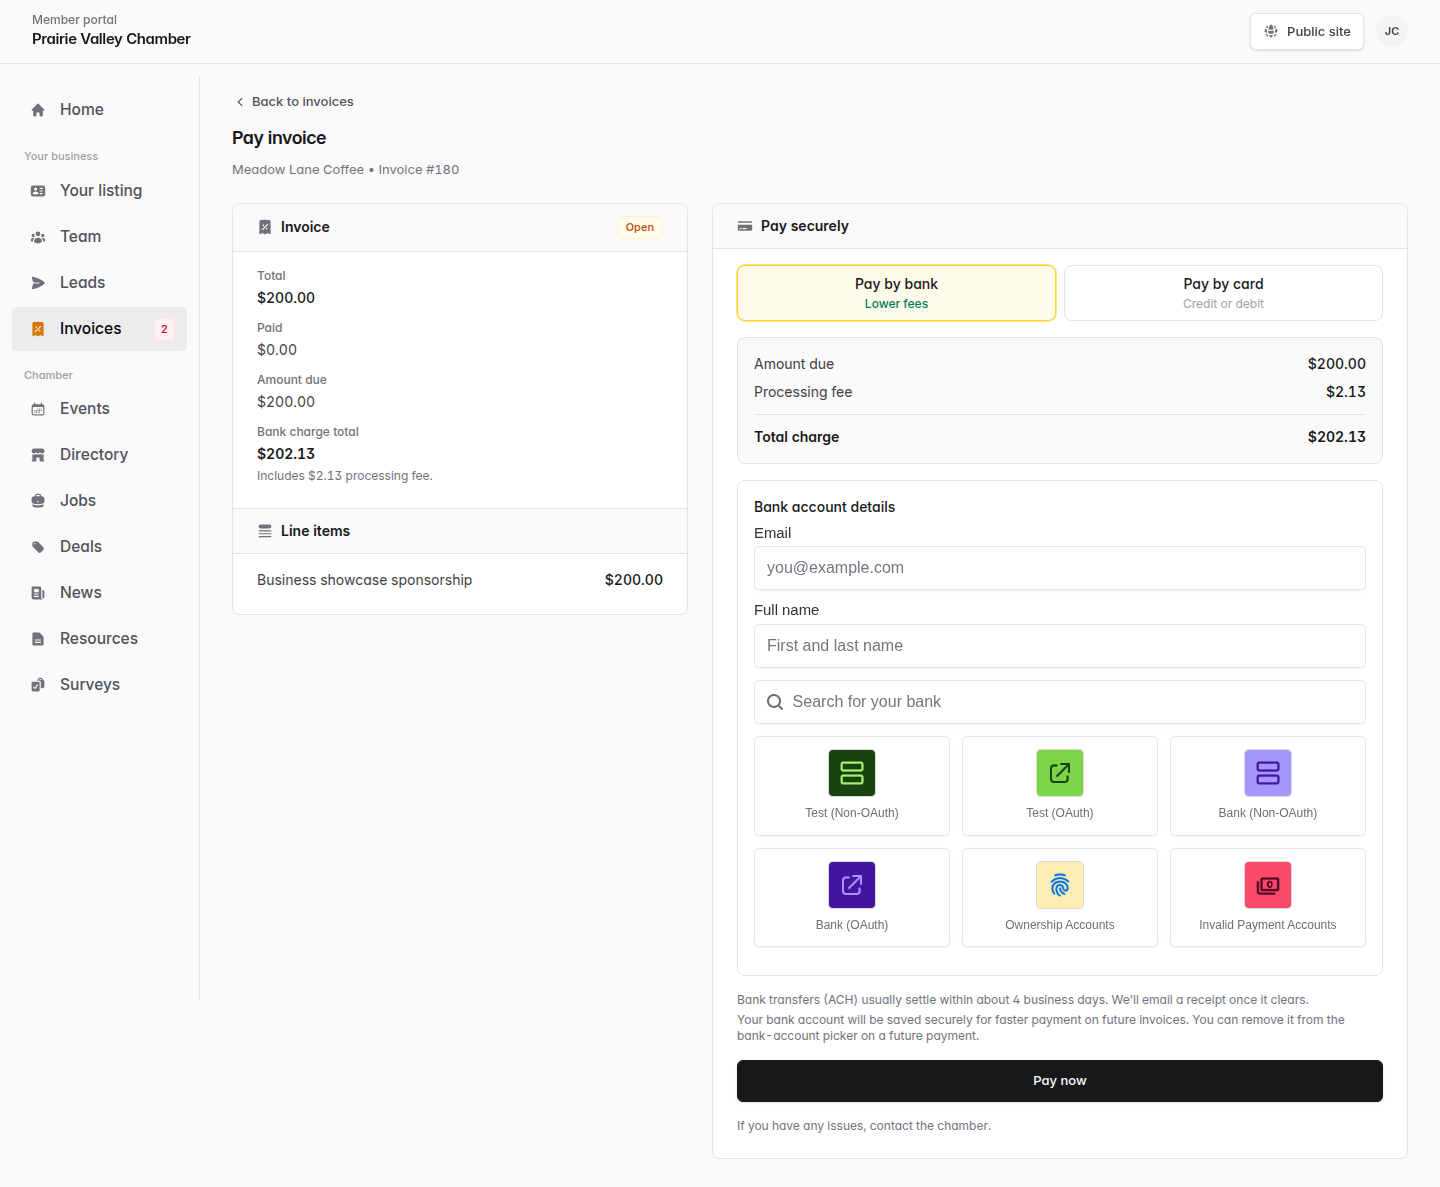
Bank payment is an option on eligible invoices. Choose the image to enlarge -
Connect your bank account
Follow the secure connection prompts and complete any verification requested by your bank. Read the account-sharing information before continuing. The screens may differ depending on your bank.
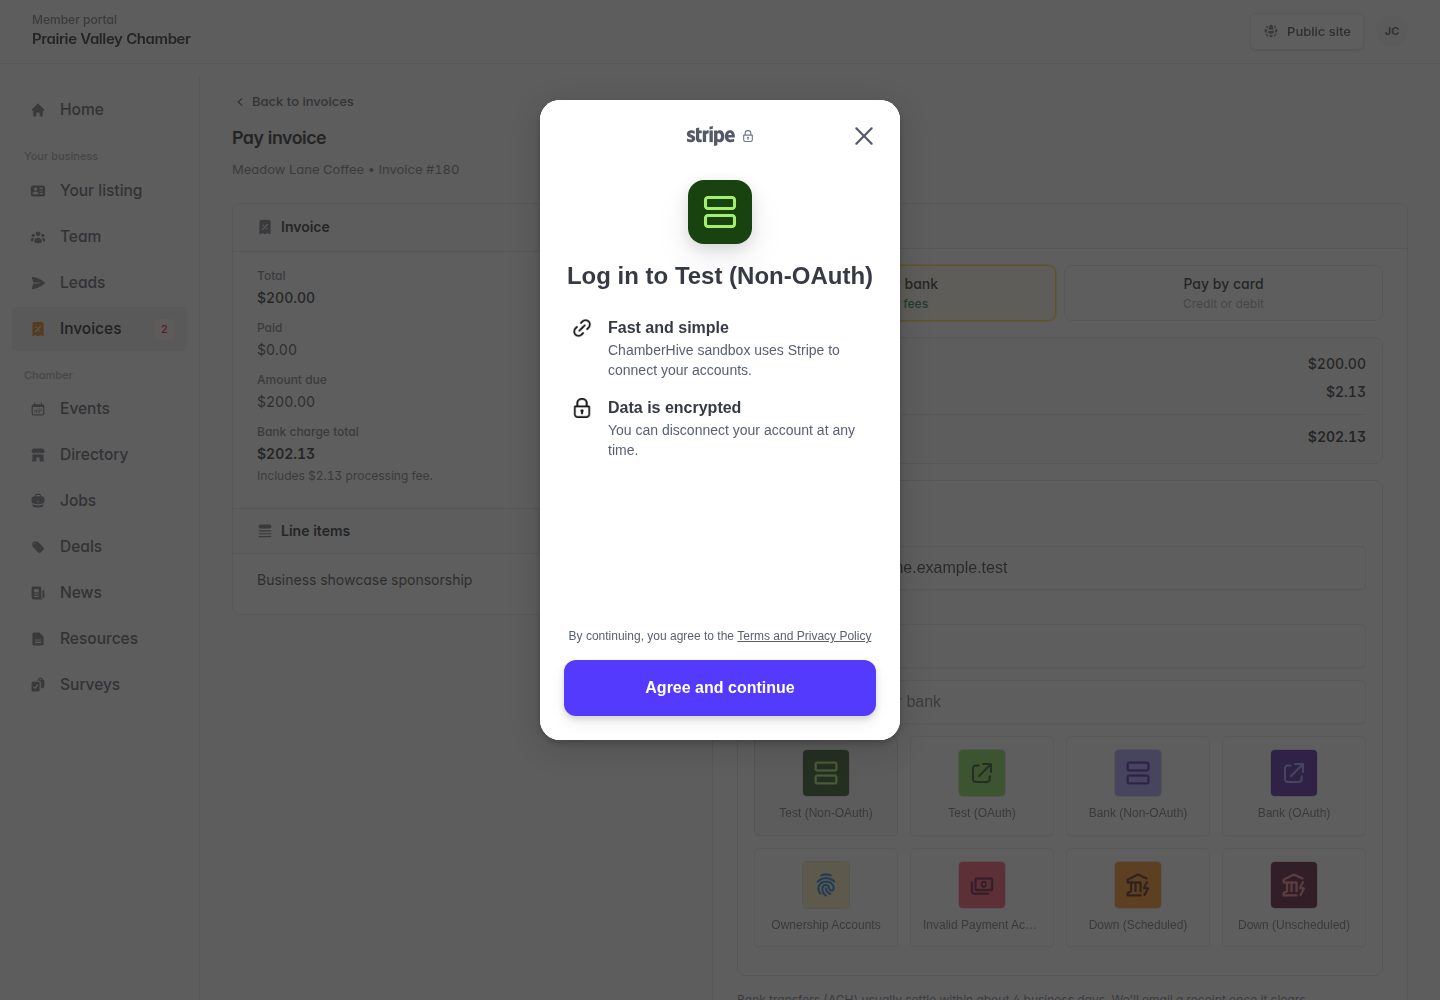
Connect the bank account you want to use for this payment. Choose the image to enlarge -
Review and submit the bank payment
After returning to the invoice, check the connected account and Total charge, including any fees. Read the payment authorization and select Pay now when you are ready.
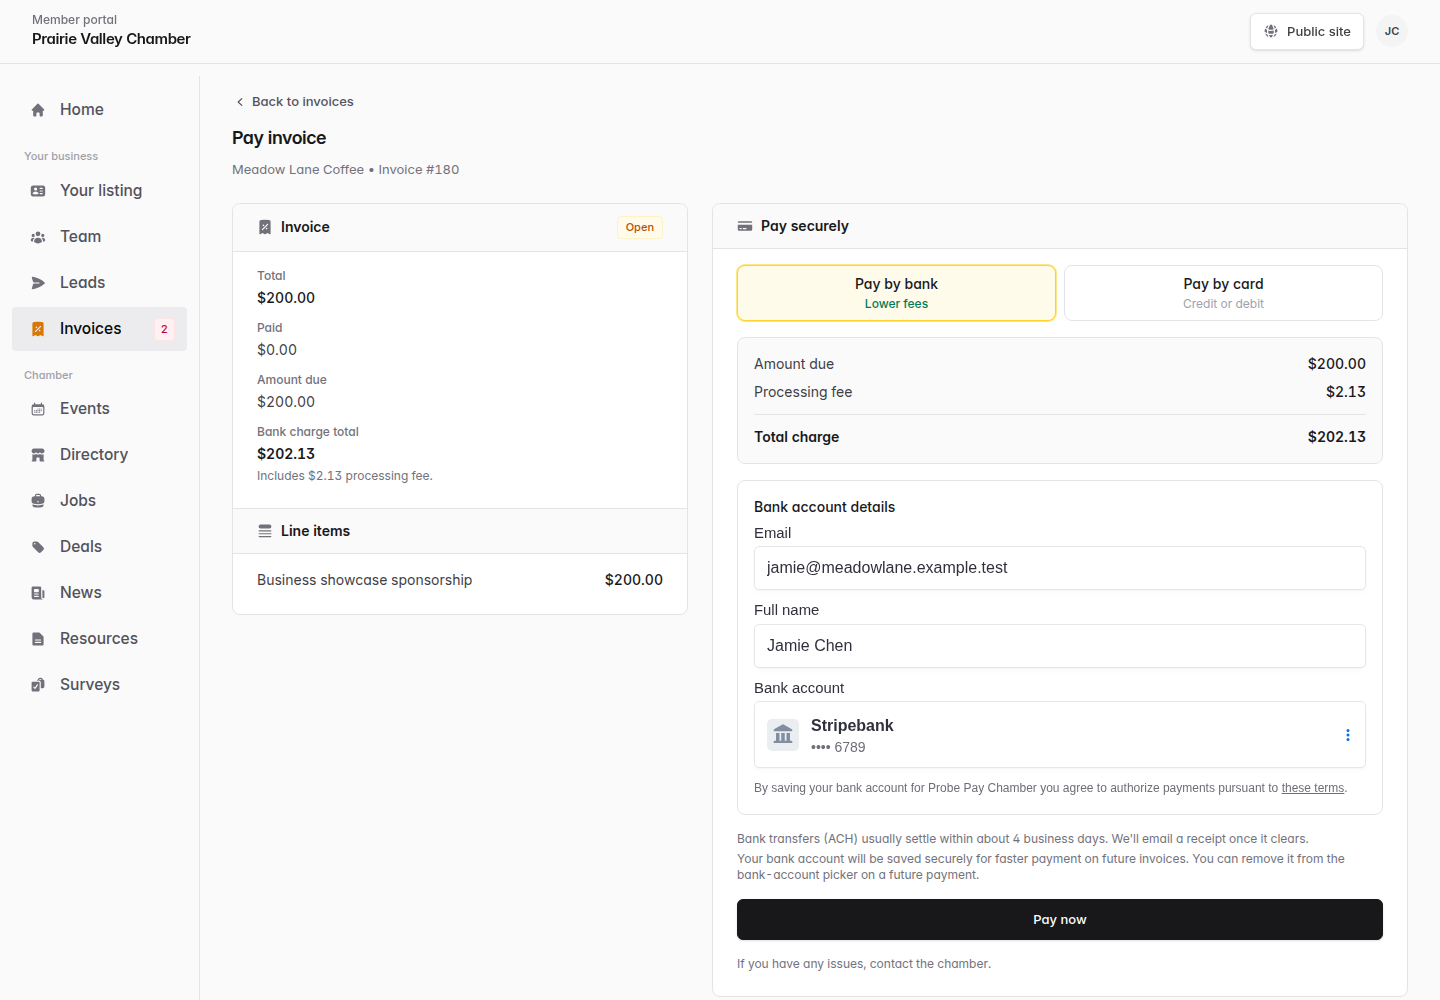
Confirm the masked bank account and total before submitting. Choose the image to enlarge -
Wait for the bank payment to settle
A processing message means the bank payment has started. Do not submit it again. Bank payments take several business days to settle. Watch for the email confirming settlement, and check Invoices for the updated balance.
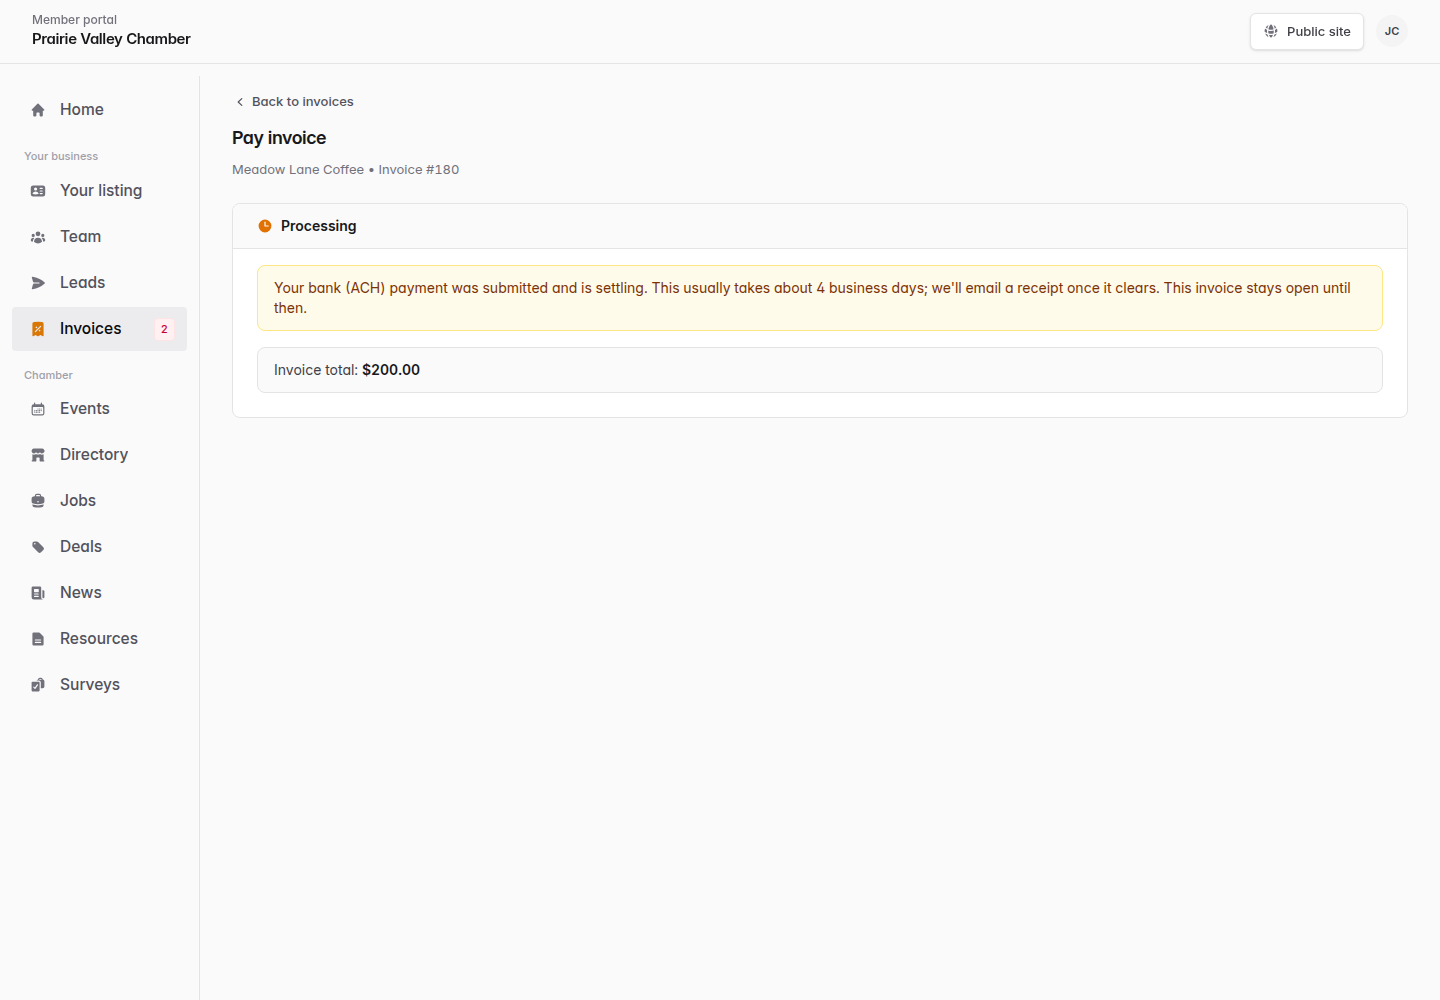
Processing is a submitted payment, not a request to pay again. Choose the image to enlarge -
Reuse the saved bank account
On a future eligible invoice, choose Pay by bank and review the saved account offered at checkout. Check the amount and authorize each payment. This is separate from automatic membership payments.
Set up membership autopay
Use a card or verified US bank account for future membership invoices.
Set up membership autopay
Use a card or verified US bank account for future membership invoices.Company admins or the current autopay authorizer
Bank account (ACH) is available when enabled by your chamber. Autopay covers the membership charges you authorize, not every purchase. A bank account saved while paying an invoice is not automatically enrolled in autopay.
-
Open Autopay settings
From Invoices, choose Autopay settings and find the membership you want to manage. Check the company and membership before continuing.
-
Choose a payment method
Select Add payment method. If one is already saved, choose Update payment method or Review and authorize. Choose Card or Bank account (ACH). If the bank option is not offered, use a card or contact your chamber.
-
Review the authorization
Check the membership amount, billing schedule, and selected packages, add-ons and adjustments. New authorizations use current rates and any proration, so amounts can change. Read the terms and check Automatically pay membership invoices, then choose Continue to card details or Continue to bank details.
-
Save your payment details
For a card, enter the card and billing details and select Save card. For ACH, check the Account holder name and Billing email, connect your bank through the secure prompts, and select Save bank account.
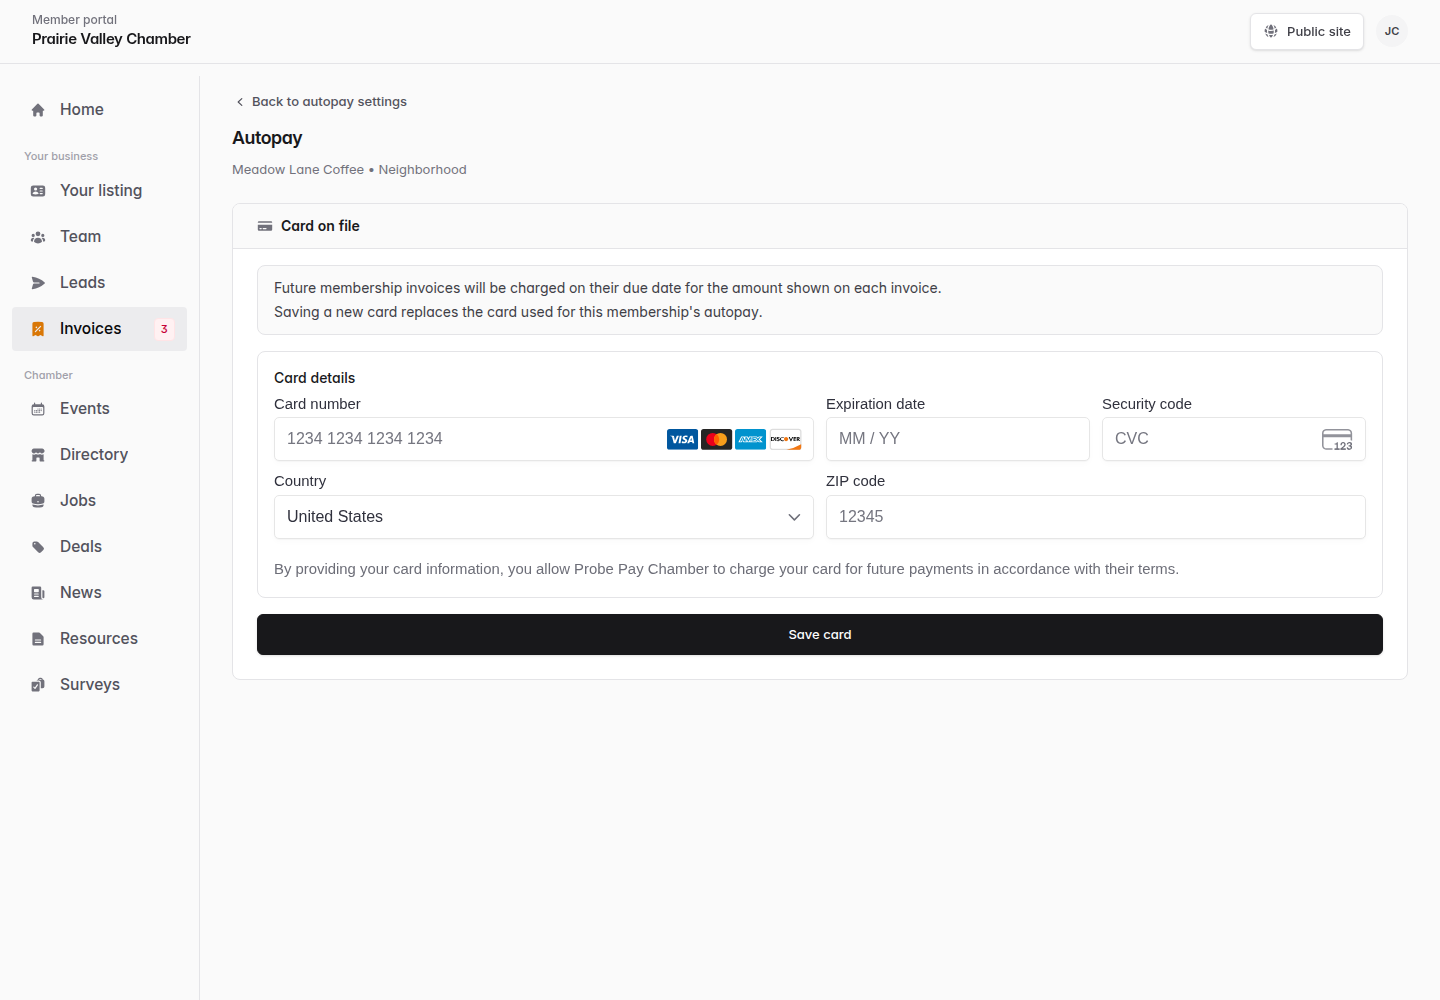
Card entry is shown here. For ACH, follow the bank account connection and verification prompts. Choose the image to enlarge -
Finish bank verification if requested
If you see Bank setup pending, choose Finish bank setup and follow Verify bank account or the instructions sent to your billing email. Choose Check status afterward. The new bank account cannot be used until verification finishes; any existing autopay stays on while its replacement is being verified.
-
Check that autopay is on
Return to Autopay settings and confirm Autopay on for the correct membership and payment method. Bank payments take several business days to complete. A processing payment has already been submitted; do not pay it again.
-
Manage autopay later
Return to Autopay settings to update your payment method or choose Turn off autopay. Turning it off stops future automatic charges and cancels unfinished bank setup, but does not cancel existing invoices or bank payments already processing. Restarting requires you to review the charges and authorize a payment method again.